There are two versions of every first-time figure painting guide on the internet. The first version tells you to gather your tools, wash the figure, apply primer, paint base coats, add shadows, add highlights, and seal. That version is technically accurate but also useless to a real beginner.
This guide is the second version of our vibrant character painting tutorial. It focuses on the silent variables — the brush angle that nobody mentions, the lighting decision that sabotages your eye work before you start, the pacing trap that turns hour three into a mistake you cannot fix and more.
Table of Contents:
- The silent variables nobody warns first-time painters about
- The hand position that changes everything
- Light direction matters more than light strength
- The first decision: which figure you paint affects every later decision
- Brush economics: how to load a brush properly
- The two-day rule: pacing your first figure
- How to know when you are about to make a mistake?
- The recovery toolkit: what to keep within reach
- Frequently asked questions
The Silent Variables Nobody Warns First-Time Painters
Most figure painting tutorials assume the reader already knows things they could not possibly know yet. They assume you understand how a loaded brush feels. They assume you know what proper lighting looks like for achieving the perfect tone in your paint job.
They assume you understand that paint behaves differently in the morning than in the evening, in a cold room than a warm one, on a freshly primed surface than on one that has cured for two days. Beginners do not know any of this. They learn it accidentally — usually after the figure has already been damaged by not knowing it.
Silent variables that matter more than technique on a first figure:
- Your body position relative to the figure — sitting wrong makes precision physically impossible
- The angle the brush meets the surface — not the brush you use, but how you hold it
- The time of day you paint — fatigue and circadian rhythm affect brush control measurably
- The temperature of the room — acrylics behave noticeably differently above 25°C or below 18°C
- What you do in the ten minutes before painting — a tense body produces a tense brush hand
None of these essential items get mentioned in standard tutorials for garage kits. All of them affect your first figure significantly. The painters who produce strong first attempts are usually the ones who instinctively get these right rather than the ones with the best paint.

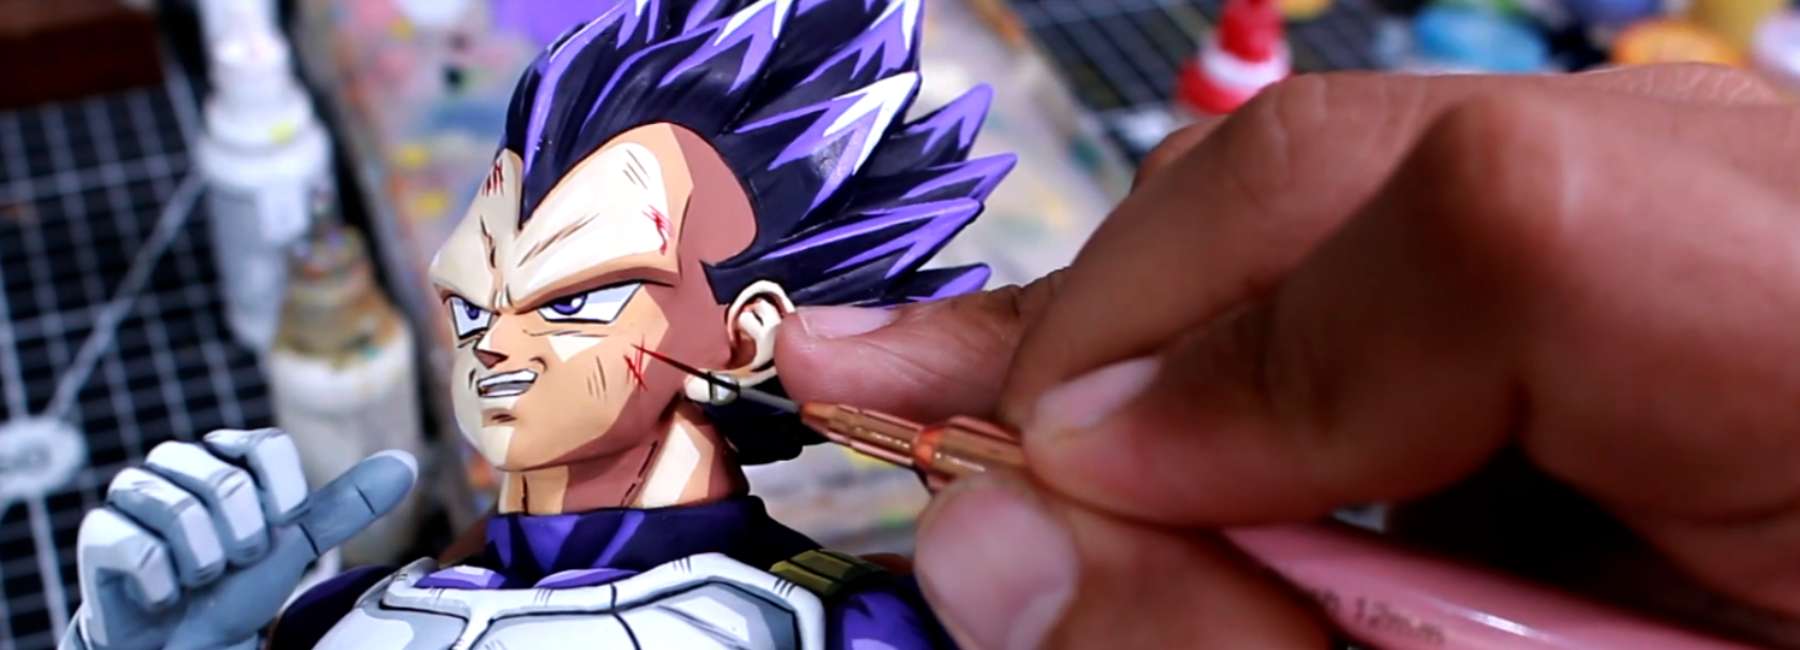
The Hand Position That Changes Everything
The single biggest predictor of brush control on a first figure is not which brush you use. It is how your hand is positioned when you use it.
The two ways beginners hold a brush wrong:
- Pencil grip with a floating wrist — the same grip you use to write, with nothing anchoring your hand. Produces shaky lines and inconsistent pressure.
- Death grip from above — squeezing the brush tightly with the wrist held high. Produces tense, jerky strokes that worsen as the hand fatigues.
The grip that actually works:
- Hold the brush like a pen, closer to the ferrule (the metal band) than to the end of the handle
- Rest the heel of your hand on the figure base, on your other hand, or on a small block on the painting surface
- Keep your elbow supported on the table — never floating
- Let your wrist anchor rather than swing
This single adjustment — anchoring the heel of the hand — produces more improvement in first-figure brush work than any technique tutorial. It is the physical foundation that makes precision possible.
- Practice the anchor before you load the brush
- Sit at your workspace, pick up an empty brush, and place your hand in painting position
- If your wrist or forearm is floating in mid-air, the position is wrong
- Find the contact point that lets your hand rest while still allowing the brush to move freely
- Once you find it, your first figure becomes significantly more achievable
Light Direction Matters More Than Light Strength
Most beginner painting guides say "use good lighting" to ensure the true color of the paint job is visible. They rarely explain what good lighting actually means, and they almost never address direction.
The lighting most beginners use:
- A single overhead lamp directly above the figure
- A desk lamp positioned over the painter's shoulder
- Ambient room lighting with no dedicated work light
All three of these flatten the figure visually. They eliminate the natural shadows that show you where sculpted detail sits, which means you paint without seeing the structure you are painting.
The lighting that experienced painters use:
- Two light sources, both positioned at roughly 45-degree angles from the figure
- One stronger than the other, creating subtle directional shadows
- Daylight-spectrum LED bulbs (5000K-6500K) rather than warm yellow lighting
- Lights positioned slightly behind and above the painter's eye level
This two-light setup reveals the figure's sculpted structure as you work. Shadows show you where the darker muscle valleys sit and where the raised planes of skin and fabric catch the light. The figure becomes legible in three dimensions rather than appearing as a flat painted shape.
The single most underrated tip: if you can only afford one upgrade to your setup, upgrade the lighting before the paints, before the brushes, before the airbrush. Two daylight LED lamps for £30 will improve your first figure more than £300 of paint upgrades.

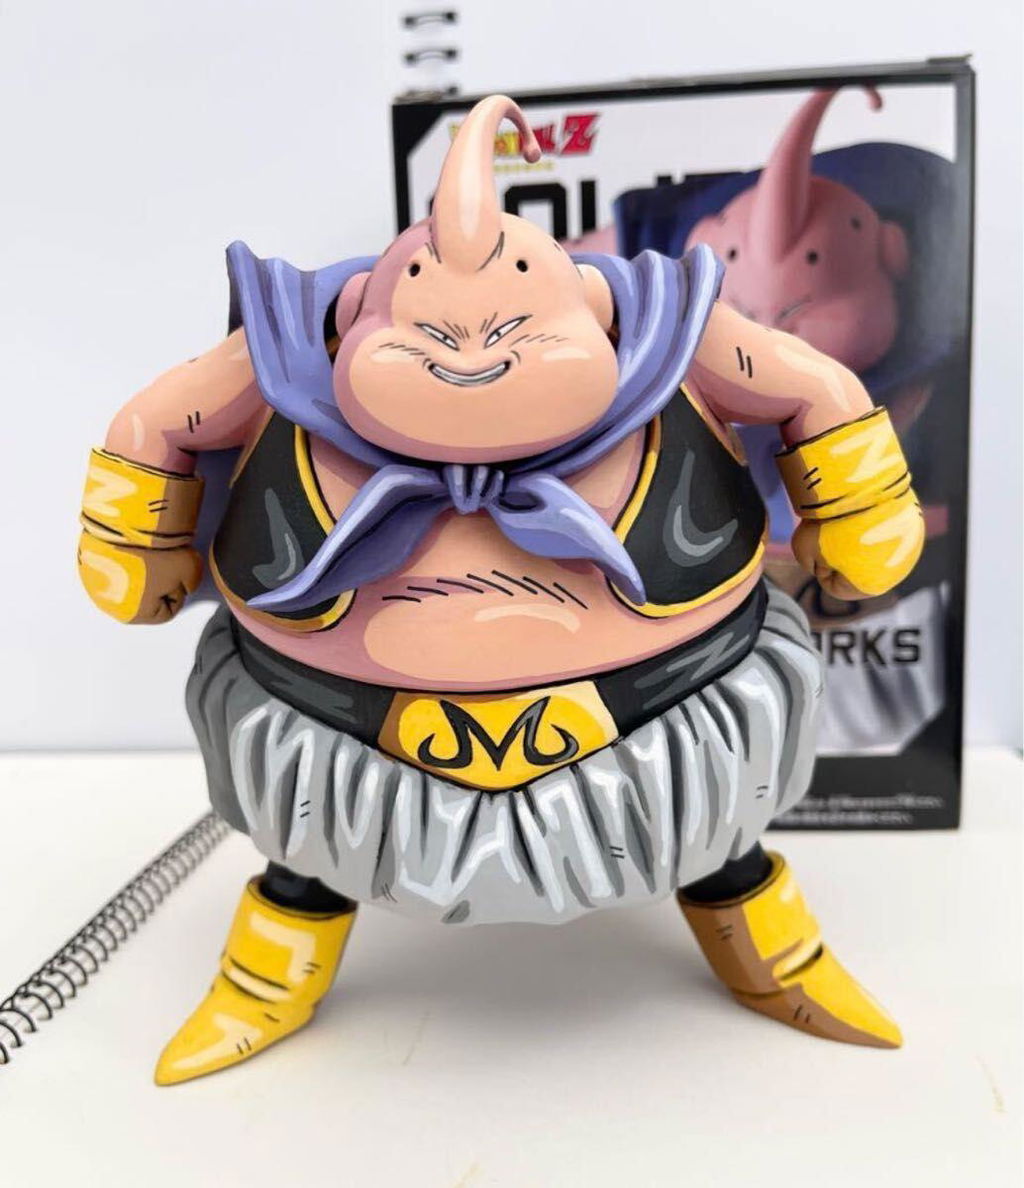
The First Figure You Paint Affects Every Later Decision
This sounds obvious but works against most beginners. The figure you choose shapes everything that follows. It determines how forgiving your mistakes can be, how long the project will take, how much detail your face work needs, and how much paint you waste learning what works.
The decision framework most beginners skip:
Rather than choosing the figure you want to paint, choose the figure that wants you to paint it. Some figures are sculpted in a way that rewards beginners. Others fight you on every brush stroke.
Figures that want to be repainted:
- Mid-size scaled poses (25cm+) where individual elements have room to breathe
- Defined muscle and armour sculpting that creates natural shadow placement
- Resin or quality PVC builds where the sculpt holds detail crisply rather than blurring under paint
- A face sculpt with deep eye sockets and clearly defined hair segments — easier to paint clean eyes and to layer raised strands
- Pre-divided sections (head, torso, legs separable) that allow you to work in stages
- A neutral pose where the figure can be rotated freely
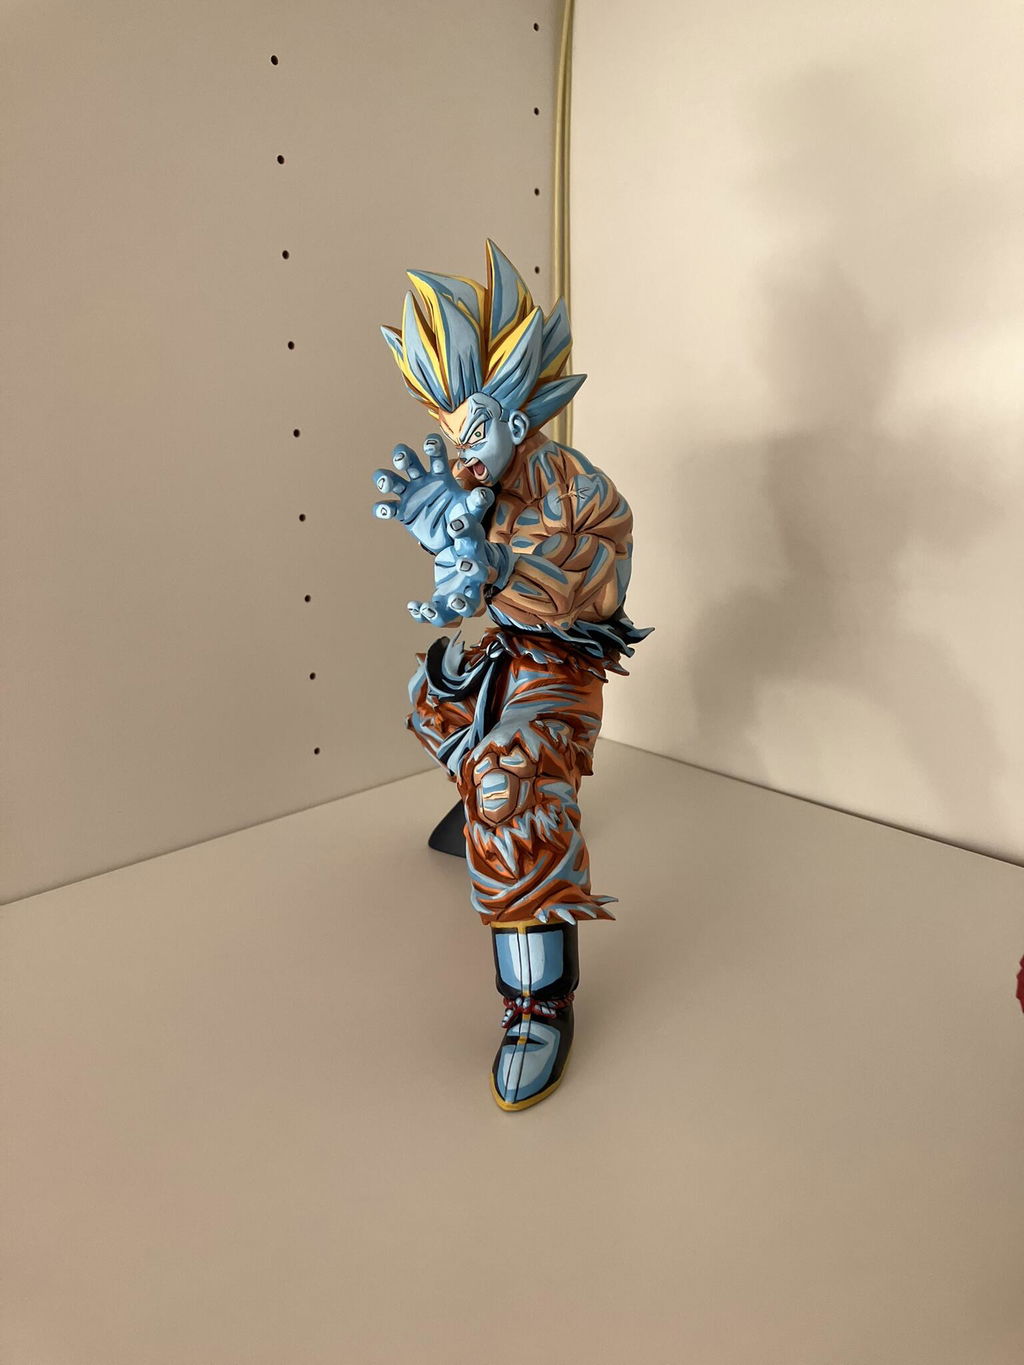
Figures that resist being repainted:
- Highly dynamic poses where the figure cannot rest on a stand
- Tiny scaled figures where eye detail is physically impossible without magnification
- Soft, smooth sculpts with little shadow detail (common on cheaper prize figures)
- Single-piece sculpts that cannot be disassembled
- Translucent or partially transparent elements that need specialised paint
- Sculpts with high surface complexity — dozens of tiny accessories, overlapping cloth folds, or fine filigree — that turn a beginner-friendly project into a months-long commitment
You can paint a figure that resists you. You will produce significantly worse results than if you had chosen one that does not. The decision before the project starts is the decision that matters most.
Brush Economics: How to Load a Brush Properly?
Loading a brush is one of the most consistently misunderstood skills in beginner figure painting. Beginners load too much paint and then deposit too much pigment on the figure.
The instinct is to dip deeply, transfer the paint, and apply. This produces patches, drips, brush strokes visible in the cured paint, and wasted product.
The four-step brush loading method that produces clean coverage:
- Dip only the tip of the brush — the first quarter of the bristle length, never the full brush
- Pull the brush across the edge of the cup or palette well — removes excess paint from one side while keeping the other side loaded
- Wipe one side on the paper towel — confirms the load is controlled, not dripping
- Test the brush on a clean spare surface — confirms the paint flows smoothly and will blend cleanly into the surrounding area before it reaches the figure
This four-step method takes ten seconds. Most beginners skip it entirely and apply paint directly from a freshly dipped brush. That single bad habit causes more first-figure problems than any technique mistake.
The visual you should look for:
- A properly loaded brush carries enough paint to lay down a clean line three or four centimetres long before requiring a reload
- If the paint runs out after a single short stroke, the load was too small
- If the brush deposits a thick visible bead on contact, the load was too large
- Aim for the middle
- The brush should feel productive but never wet to the touch
The Two-Day Rule: Pacing Your First Figure
The most consistent reason first figures disappoint is that beginners try to finish them too fast. A first anime figure is a project that needs space — drying time, mental breaks, and the perspective that comes from looking at the figure with fresh eyes the next day.
The two-day rule:
- After any stage with significant impact - zenithal priming, the first wash, the first cel-shading pass, the eye detailing stop
- Walk away
- Come back at least 24 hours later and look at the figure under fresh light before continuing.
Two specific things happen when you do this:
- You see mistakes you could not see while painting. Tunnel vision sets in fast during a session. A break breaks the tunnel vision.
- You make better decisions about the next stage. Knowing how the previous stage actually turned out informs what the next stage needs to do.
The beginners who finish first figures in a single weekend almost always produce inferior results to the beginners who spread the same work across two weeks. Same hours, different pacing — significantly different outcomes.
The Pacing Schedule:
- Day 1: Wash, sand, spray prime. Stop.
- Day 3: Apply base coats on the largest areas only. Stop.
- Day 5: Complete base coats. Apply first wash. Stop.
- Day 7: Layering and cel-shading. Stop.
- Day 10: Edge highlighting and basic face work. Stop.
- Day 12: Final face detail and any corrections. Stop.
- Day 14: Sealing. Final inspection. Done.
This is not a strict schedule. It is a structure that gives the work the space it needs to develop. Compress it heavily and the figure suffers. Stretch it well beyond this and you risk losing momentum. The middle is where good results live.
👉 Learn to Repaint: Figure Painting Course
How to Know When You Are About to Make a Mistake?
Experienced painters develop an internal alarm system. It tells them when their next brush stroke is likely to ruin the work.
Beginners do not have that alarm yet. They make the stroke, see the mistake, and only then understand what was about to go wrong.
Five warning signs that mean you should stop and reset:
- Your hand is shaking visibly. Stop. You are tired. Come back later. Continuing produces mistakes you cannot reverse.
- You are squinting at the figure. Your lighting is wrong, or your eyes are fatigued. Either fix the lighting or stop the session.
- You are repainting the same area for the third time. You have lost perspective on whether the work is actually wrong, or whether you are just over-tweaking. Stop. Photograph the figure. Assess in the photo, not in person.
- You are reaching for new paint mixes you have not used before. Mid-session paint experimentation is rarely a good idea. Stick with the colours and mixes you set up at the start of the session.
- You feel rushed. A rushed brush hand is a brush hand that ruins figures. If you are time-pressured, stop. The figure will still be there tomorrow.
These five warning signs are responsible for the majority of first-figure disasters. Learning to recognise them is half the battle.
The Recovery Toolkit: What to Keep Within Reach?
Mistakes happen. The painters who recover from them are the ones who have the right tools within arm's reach when the mistake occurs.
Essential recovery items for a first figure:
- A clean, slightly damp brush — for lifting wet paint before it dries
- Cotton swabs — for precise removal of paint in small areas
- Isopropyl alcohol (70% or 90%) — for lifting cured acrylic paint without damaging the figure
- Fine-grit sandpaper (1200-grit and 2000-grit) — for smoothing repaired areas before re-priming
- A small bottle of base primer — for seamless re-priming small repaired patches
- A reference photo of the figure — so you do not lose track of the intended look while panicking about a mistake
Keep these within reach throughout every session. The single most expensive mistake a beginner can make is panicking when something goes wrong, scrubbing aggressively at the figure, and turning a small fixable error into a large unfixable one.
When something goes wrong:
- Stop immediately. Do not try to fix it in motion.
- Let it dry fully. Wet correction almost always makes things worse.
- Photograph the figure before any repair attempt. You may discover the "mistake" looks different than you thought once viewed in a photo.
- Apply the correction in small steps. Half a fix at a time, with drying breaks between each.
A first figure rarely gets ruined by a single mistake. It gets ruined by panicked attempts to fix a single mistake. The recovery mindset matters more than any specific recovery technique.
Questions: Paint Anime Figures
How do I know if I am holding the brush correctly?
If the heel of your hand is resting on the figure base, your other hand, or a stable surface, and your wrist is not floating in mid-air, you are holding the brush correctly. If your hand is floating freely, the position is wrong regardless of how natural it feels.
What is the single biggest mistake first-time painters make?
Trying to fix wet paint mistakes. Almost every disaster first figure starts with someone scrubbing at a small problem while the paint is still wet, turning a fixable mistake into an unfixable one. The correct response to any mistake is to stop, let it dry, and then assess.
Do I need expensive lighting to paint a figure properly?
No, but you need at least two light sources at angles. Two daylight-spectrum LED desk lamps cost roughly £15-£30 each and improve first-figure outcomes more than any other equipment upgrade in the same price range. Lighting is the most underrated variable in figure painting.
How do I know when I am too tired to keep painting?
If your hand is shaking, if you are squinting at the figure, or if you have been working on the same small area for more than ten minutes without progress, you are too tired. Stop. The work will still be there tomorrow. Tired-hand mistakes are usually the ones that ruin figures.
What if my first figure looks bad?
Look at it again 48 hours later in good light, then decide. The work you produce while painting almost always looks worse than the work you assess after fresh perspective. If it still looks bad after that, identify which specific stage went wrong and use that information to choose the next figure more carefully.
How long until I can produce work I am genuinely proud of?
The honest answer is figure three or four. Your first figure teaches you the process. Your second figure applies what you learned. Your third or fourth figure is usually the one that feels properly achieved. The painters who quit usually quit after figure one without realising that figure three is where the breakthrough lives.
Is there a moment when I should walk away from a figure permanently?
Rarely. Most figures that feel ruined are still recoverable with sanding, re-priming, and repainting. The figure is rarely the problem. The fatigue or frustration in the moment is the problem. Walk away from the session, not the figure. Come back two days later and assess again.
Conclusion: Anime Figure Painting
The painters who produce strong first figures are not more talented than the ones who do not. They are not better equipped. They have not necessarily watched more tutorials. They have done one thing differently: they have respected the silent variables.
Hand position. Lighting direction. Pacing. Brush loading. Knowing when to stop. Knowing when to walk away. None of these appear in standard tutorials, but they determine the result more than any single technique.
The seven painting stages — preparation, priming, base coating, washing, layering, cel-shading, edge highlighting, face work, sealing — are covered in depth across our eight-article technique cluster.
Share:
Step by Step Figure Eye and Face Detailing Guide
Which Repainting Anime Figure Studio & Artist Is the Best?