
If you've spent any time looking at high-quality Dragon Ball figure repaints, you've probably asked yourself the same question most collectors and beginners ask: how does the paintwork actually get that good?
The answer is not a single secret technique. It is a combination of methods, applied in the right order, with enough control and patience to let each one do its job properly. The best Dragon Ball artists are not necessarily the most naturally gifted. They are the ones who have understood the core figure painting techniques well enough to apply them consistently, figure after figure, without guessing.
This guide breaks down the eight techniques that show up in almost every strong Dragon Ball repaint, using the kind of methods you’ll often see across the best painting tutorials for anime figures. Whether you are painting your first Vegeta or refining your tenth Goku, understanding these methods will change how you see the process — and how your figures look on the shelf.
Table of Contents:
- What makes Dragon Ball figures different to paint?
- Technique 1: Zenithal Priming
- Technique 2: Base Coating
- Technique 3: Washing and Shading
- Technique 4: Layering
- Technique 5: Cel-Shading
- Technique 6: Edge Highlighting
- Technique 7: Dry Brushing
- Technique 8: Face and Eye Detailing
- Frequently Asked Questions
What Makes Dragon Ball Figures Different to Paint?
Dragon Ball Z figures sit in a unique place in the repaint world. The characters are iconic enough that collectors immediately notice when something looks off — wrong skin tone, weak eye work, flat armour — but they also have a strong graphic, animated quality that rewards bold techniques over soft, realistic ones.
Unlike historical miniatures or realistic portrait figures, Dragon Ball repaints are not trying to imitate life.
They are trying to capture the feeling of the anime:
- strong contrast
- clean colour separation
- sharp line work
- faces that carry the character's personality clearly
That means some techniques that work brilliantly on other figure types, especially when using miniature paint on smaller collectible surfaces, need to be adjusted here, while others — particularly cel-shading and controlled washing — become absolutely central to getting the result right.
🎨 Technique 1: What is Figure Zenithal Priming?

ANSWER: Standard priming gives the figure a single base colour — usually grey or white — all over. Zenithal priming does something more useful. It simulates natural light from above by applying first a dark primer "black" across the whole figure, then spraying a lighter colour from directly overhead.
The result is a figure that already has a built-in sense of light and shadow before a single brush stroke of colour is applied.
For Dragon Ball figures specifically, this is valuable because it helps establish where the highlights and shadows should naturally sit. When you apply your base coats over a zenithal prime, the light areas and darker recesses are already partially in place — you are working with the figure's structure rather than trying to create depth from scratch later.
How to apply it:
- Spray a dark grey or black primer evenly across the whole figure
- Let it dry fully
- Hold your white or light grey primer directly above the figure and spray in short bursts, allowing coverage to fall naturally on upward-facing surfaces
- The result should be: dark underneath, mid-tone on the sides, lighter on top
Practical tips:
- Keep your light coat short — you are catching top-facing surfaces only, not re-priming the whole figure
- Use a grey primer as your dark base rather than pure black for a softer transition
- Study the figure under your painting light after the zenithal and note where the lighter areas landed — this will guide your shading and highlighting later
What beginners get wrong:
- Spraying the light coat from too far away or at too low an angle, which kills the effect entirely
- The top-down angle is what creates the gradient — if you spray from the side, you just get uneven grey coverage
- The zenithal needs to be controlled and deliberate, not a second all-over coat
🎨 Technique 2: What is Figure Base Coating?

ANSWER: Base coating is where your repaint actually begins to take shape, and it is the technique most beginners rush past without understanding what it is really supposed to achieve.
A base coat is not just the first colour you slap on. It is the foundation that every subsequent technique — shading, highlighting, cel-shading, face work — depends on. If your base coats are patchy, too thick, or inconsistent, you will be fighting that problem through every stage that follows.
For Dragon Ball figures, clean base coats matter even more than usual because the characters' colours are bold and distinctive. A weak Vegeta bodysuit colour, an off-white armour panel, or a muddy skin tone will read immediately to any collector familiar with the character.
How to apply it:
- Thin your paint on the palette until it flows smoothly without flooding detail, especially when working with acrylic paints like Vallejo
- Apply in thin, controlled layers — aim for two to three coats rather than trying to cover in one heavy coat of paint
- Work from larger areas down to smaller ones — bodysuit first, then armour, then smaller details like gloves, boots, and trim
- Let each coat dry properly before the next
Example colour sequence for a Vegeta repaint:
- Skin tone areas first
- Main bodysuit (purple or blue depending on the saga)
- White or light grey armour panels
- Gold chest details
- Black gloves, boots, and outline areas
Practical tips:
- Your first coat will look patchy — that is completely normal and expected
- Never go back over paint that is starting to dry mid-stroke; wait for the layer to finish drying and apply a fresh coat
- Paint in consistent directional strokes per layer rather than scrubbing the brush back and forth
What beginners get wrong:
- Trying to achieve full, even coverage in a single coat, which leads to thick paint that fills in sculpted detail and leaves visible texture
- Two thin coats will always give a cleaner, more professional result than one heavy one
🎨 Technique 3: What is Figure Washing and Shading?

ANSWER: Washing is the technique that adds depth and dimension, and it becomes even more effective when paired with strong colour control and sensible color schemes across the figure.
A wash is a highly thinned, darker-toned paint that flows into the recesses and crevices of a figure by gravity and capillary action.
When applied correctly, it naturally settles into the deepest areas — between muscle groups, into clothing folds, around armour edges, beneath the chin — making the figure read with genuine three-dimensional structure rather than flat colour.
The keyword is controlled. A wash applied sloppily will pool on flat surfaces, create tide marks around edges, and leave the figure looking dirty rather than shaded. Applied with intention, it transforms a base-coated figure into something that already starts to feel premium.
Recommended washes for Dragon Ball figures:
- Citadel Reikland Fleshshade — over all skin tones for warm, realistic depth
- Citadel Druchii Violet — over purple bodysuit areas
- Citadel Nuln Oil — over darker armour, boots, and black areas
- Citadel Agrax Earthshade — over gold and brown details
How to apply it:
- Load the brush lightly — you are not flooding the surface, you are guiding the wash into the right areas
- Apply carefully into recesses, joints, clothing folds, and muscle separations
- Remove any excess from flat surfaces before it dries using a clean, slightly damp brush
- Allow full drying time before moving to the next stage
Practical tips:
- Apply washes in small sections rather than washing the whole figure at once — this gives you more control over where the excess goes
- A wash over your finished base coat will temporarily make the figure look much darker than intended — that is expected, and the layering and highlighting stages will bring it back
- Never shake your wash before using it; tilt gently to avoid bubbles
What beginners get wrong:
- Applying too much wash and not removing the excess, leaving flat areas looking stained rather than shaded
- The wash should enhance recesses, not cover the whole surface with a darker tone
- Control is everything here
🎨 Technique 4: Figure Layering Tutorial

ANSWER: Layering is the technique that brings the figure back after shading — and it is the difference between a repaint that looks muddy and one that feels clean, structured, and deliberately painted.
After a wash, the whole figure tends to look darker and heavier than it should. Layering is the process of carefully reapplying the original base colour to the raised surfaces — muscles, armour panels, fabric peaks, hair ridges — while leaving the darker wash visible in the recesses beneath them.
The result is a natural-looking transition from shadow to mid-tone that follows the figure's actual sculpted structure.
How to apply it:
- Mix your base colour back to a smooth, workable consistency
- Apply carefully to raised surfaces only — avoid letting paint creep down into the areas where the wash has settled
- Build the layer gradually; multiple careful passes give more control than one heavy application
- Leave slightly more of the shaded tone visible than feels natural — highlights will push the contrast further in the next stage
Practical tips:
- Use a slightly lighter version of your base colour for the layer, which helps you create highlights more naturally before the final edge work
- Work slowly around detailed areas like hands, belt attachments, and hair segments
- Compare your figure to anime reference images as you go — layering is where the character's look starts to emerge properly
What beginners get wrong:
- Over-layering and painting back over the shadowed areas they spent time creating during the wash stage
- The shadows should still be clearly visible after layering
- If your figure looks almost the same as it did before the wash, the layering has gone too far
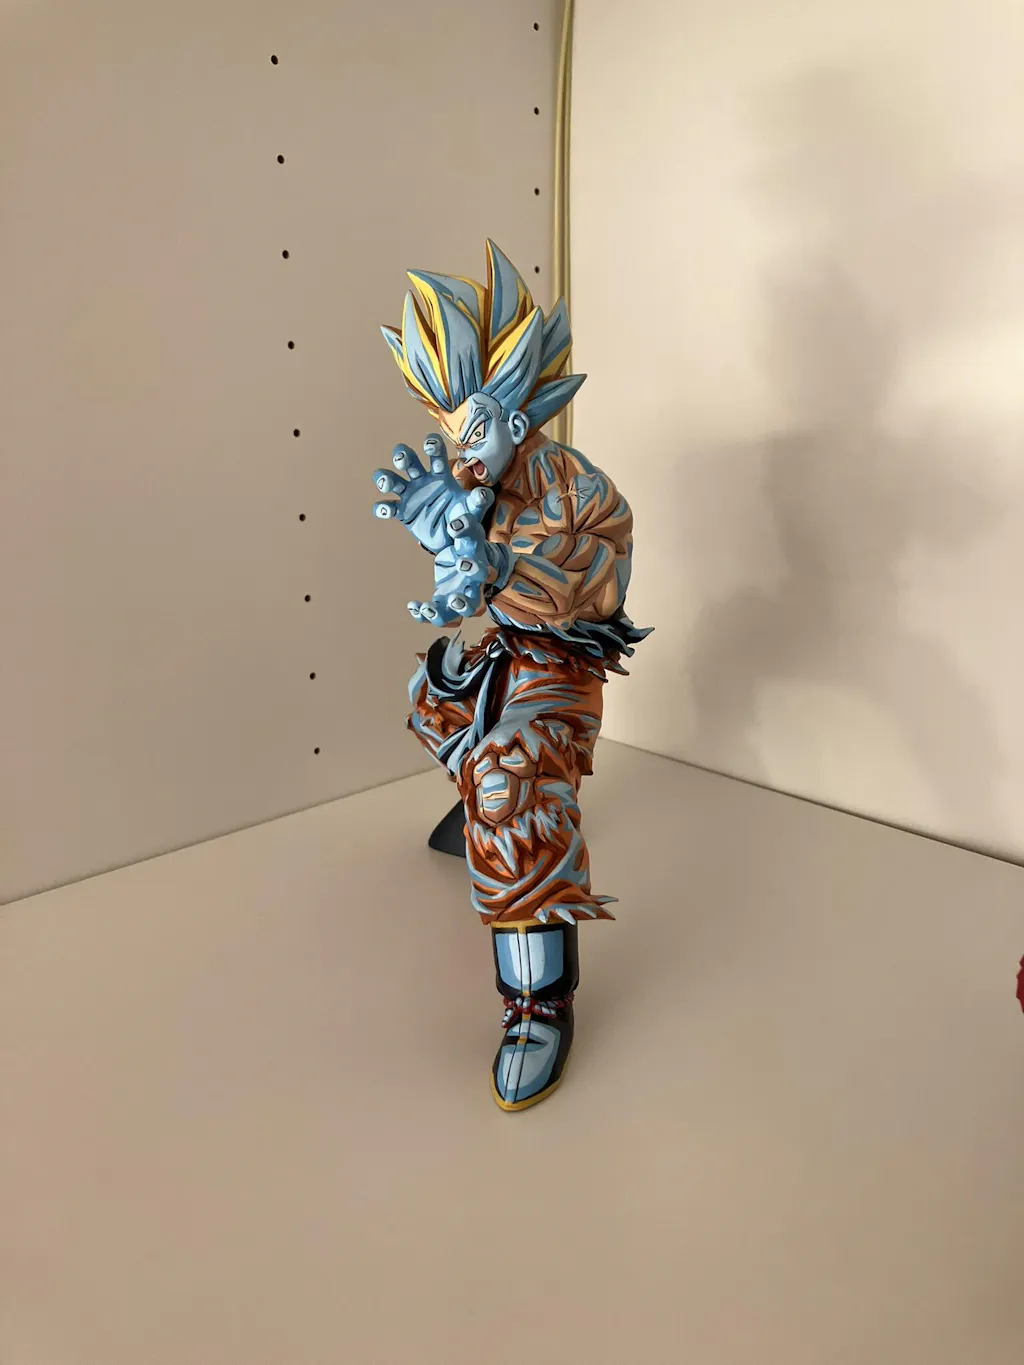
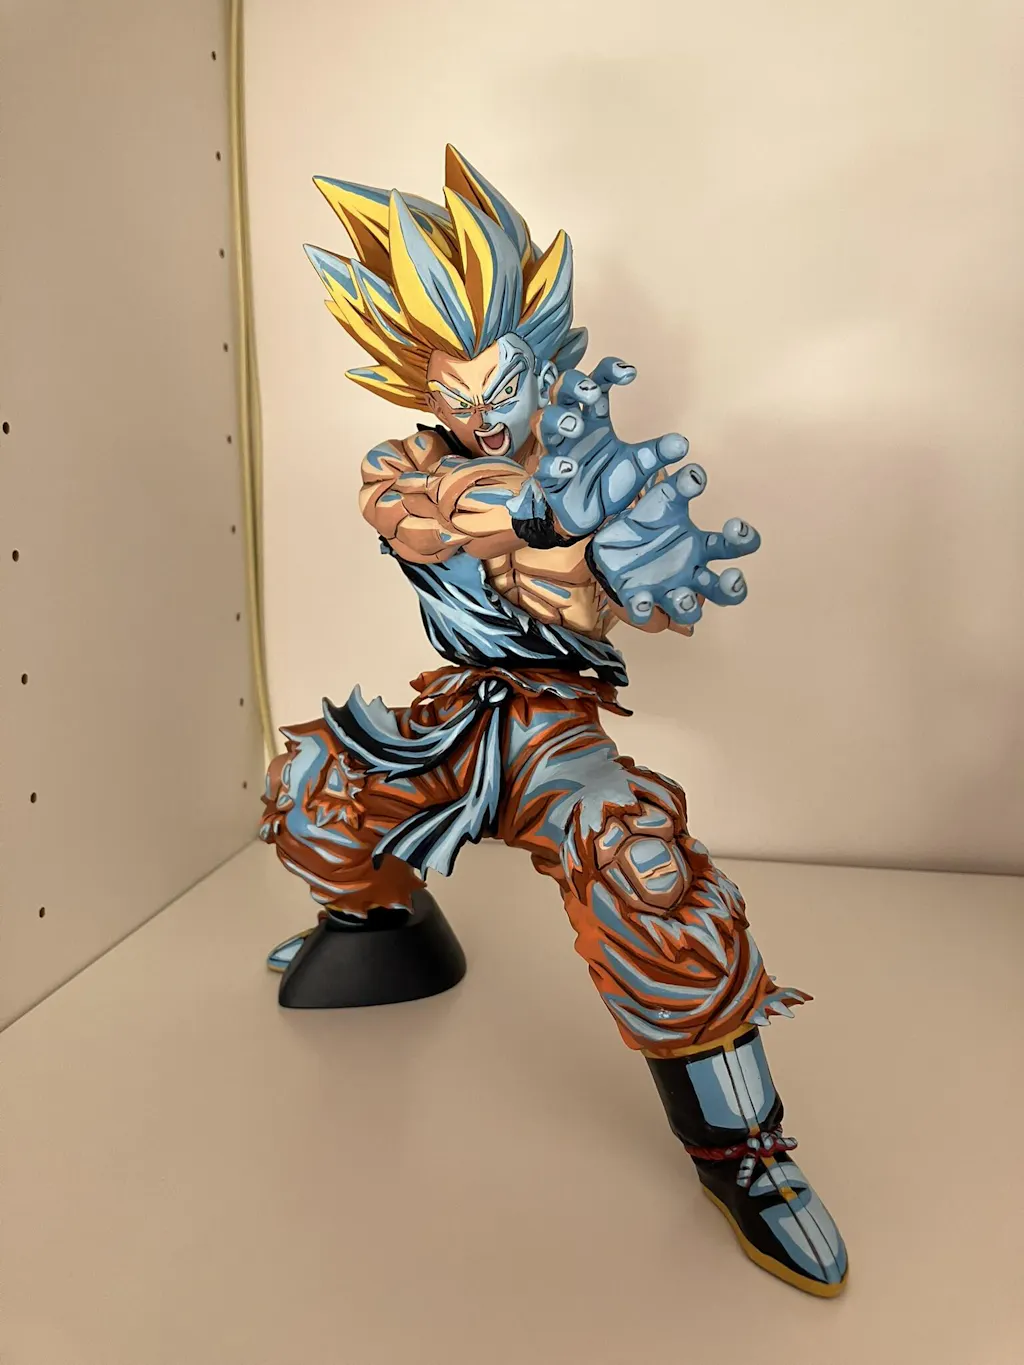
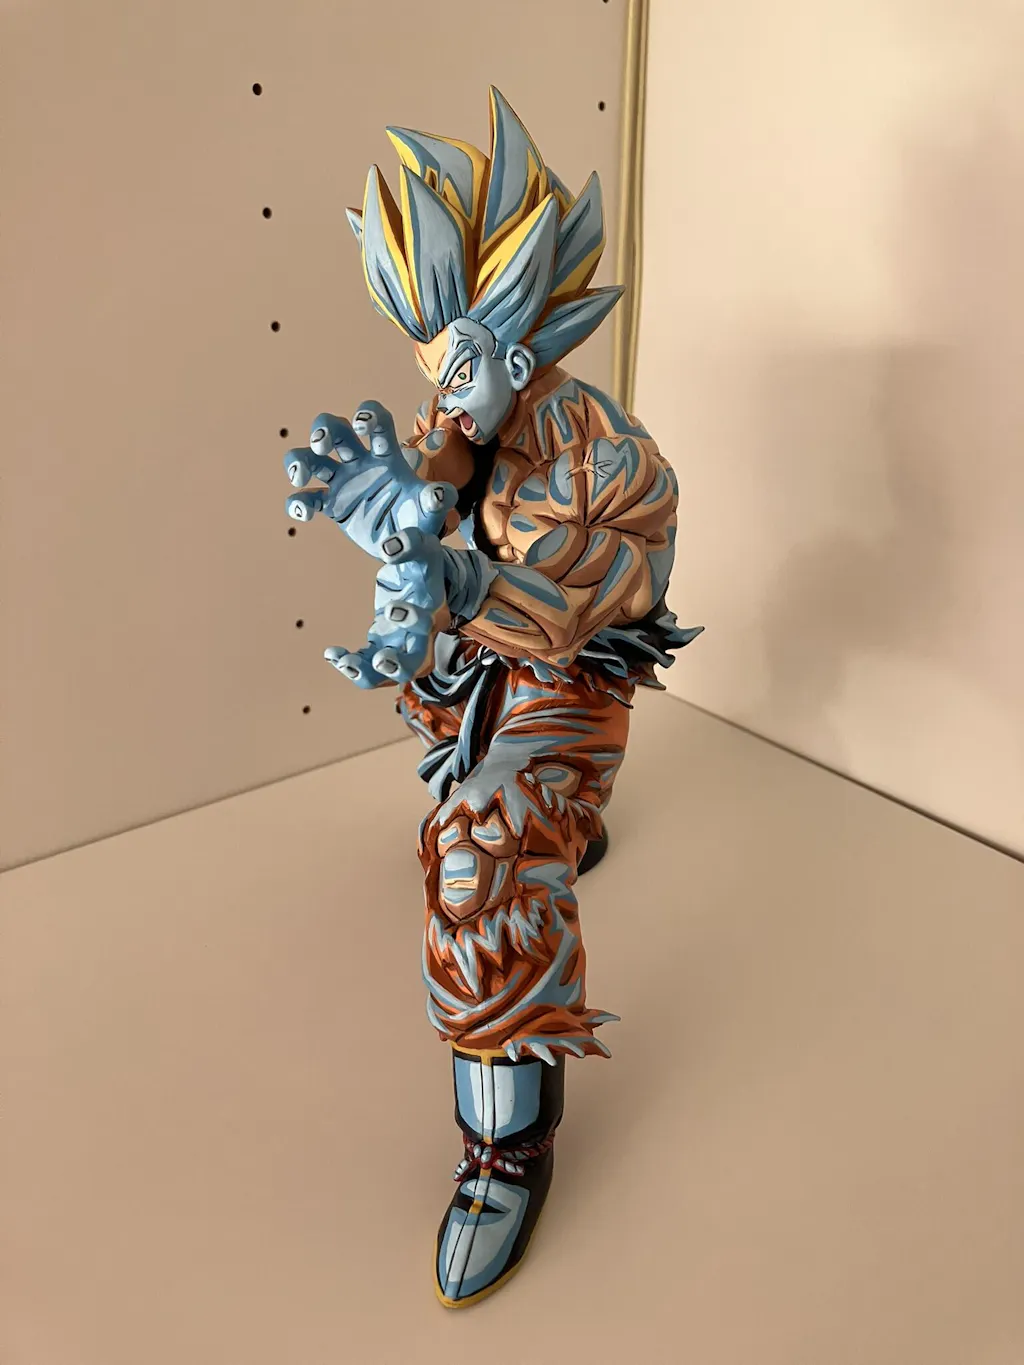
🎨 Advanced Painting Technique 5: What is Figure Cel-Shading?

ANSWER: Unlike soft blending techniques that aim for realism, cel-shading uses bold, clearly defined shadows with sharp transitions. The goal is to make the figure look like it belongs in the anime: strong contrast, clean edges between light and shadow, and a visual style that reads clearly from a display distance.
When done well, it makes muscles, clothing folds, armour, and hair look more graphic and more powerful — exactly the quality Dragon Ball characters demand.
How to apply it:
- Use a noticeably darker version of each base colour for the shadow areas — not a subtle darkening, but a clear, defined step down in tone
- Place shadows with intention: under the chin, beneath overhanging armour, inside muscle separations, under hair spikes
- Keep the transition edges clean and relatively sharp rather than blended softly
- Use a size 0 or fine detail brush for controlled shadow placement
Practical tips:
- Study anime screenshots before painting — real Dragon Ball frames show exactly where the shadows sit and how sharp they are
- Bold is better than timid in cel-shading — if the shadows look too obvious while you are painting, they often look just right once the figure is viewed from a normal display distance
- Avoid the temptation to blend the shadow edges out; that softness kills the anime look immediately
What beginners get wrong:
- Over-blending
- The instinct to smooth everything out is strong, but soft gradients are what make a cel-shaded repaint look like any other ordinary painted figure rather than an anime-inspired one
- Sharp transitions are the point
🎨 Technique 6: What is Figure Edge Highlighting?

ANSWER: It involves applying a lighter version of the base colour to the sharpest, outermost edges of the figure — the tips of armour corners, the ridges of muscles, the outer edges of gloves and boots, the top edges of hair spikes.
These are the surfaces where real light would catch most strongly, and painting them with a lighter tone helps the figure feel more alive, more dynamic, and more sharply defined.
For Dragon Ball Z figures specifically, edge highlighting also reinforces that graphic, illustrated quality. The highlighted edges act almost like a drawn outline in reverse — they define the silhouette and separate the figure's forms clearly, which is exactly what anime line work achieves on screen.
How to apply it:
- Mix a highlight colour by adding white or a lighter tone to your base colour — usually a 50/50 mix to start, then a more extreme version for the final edge
- Load the brush lightly and drag it carefully along only the outermost edges
- Use the side of your brush tip rather than the very point — this gives a more controlled, consistent line
- Focus on corners and ridges; avoid highlighting large flat surfaces
Key areas to highlight on a Vegeta figure:
- Outer shoulder armour edges
- Upper ridges of the forearms and gloves
- Leading edges of the boots
- Top edges of hair segments
- Sharpest ridges along the chest and belt
Practical tips:
- Less paint on the brush is almost always better for edge highlighting — wipe excess on your paper towel before touching the figure
- A slightly steadied hand (rest your wrist on the table or against the figure stand) gives significantly better line control
- Apply the highlight in a single smooth stroke if possible; going back and forth tends to thicken the line and lose the crisp edge quality
What beginners get wrong:
- Applying edge highlights too thick or too broadly, which makes the figure look chalky and overlit rather than sharp
- Edge highlights should be a fine accent line, not a wide painted strip along every raised surface
🎨 Technique 7: What is Figure Dry Brushing?

ANSWER: Dry brushing is a surprisingly versatile figure painting technique that works particularly well for adding subtle surface texture, hair detail, and final highlight accents to Dragon Ball figures.
The technique works by loading a stiff-bristled brush with paint and then removing almost all of it on a paper towel before lightly dragging the almost-dry brush across a surface.
The small amount of pigment remaining catches on the highest raised points without filling in the recesses, creating a fast, effective highlight that follows the sculpt's natural texture.
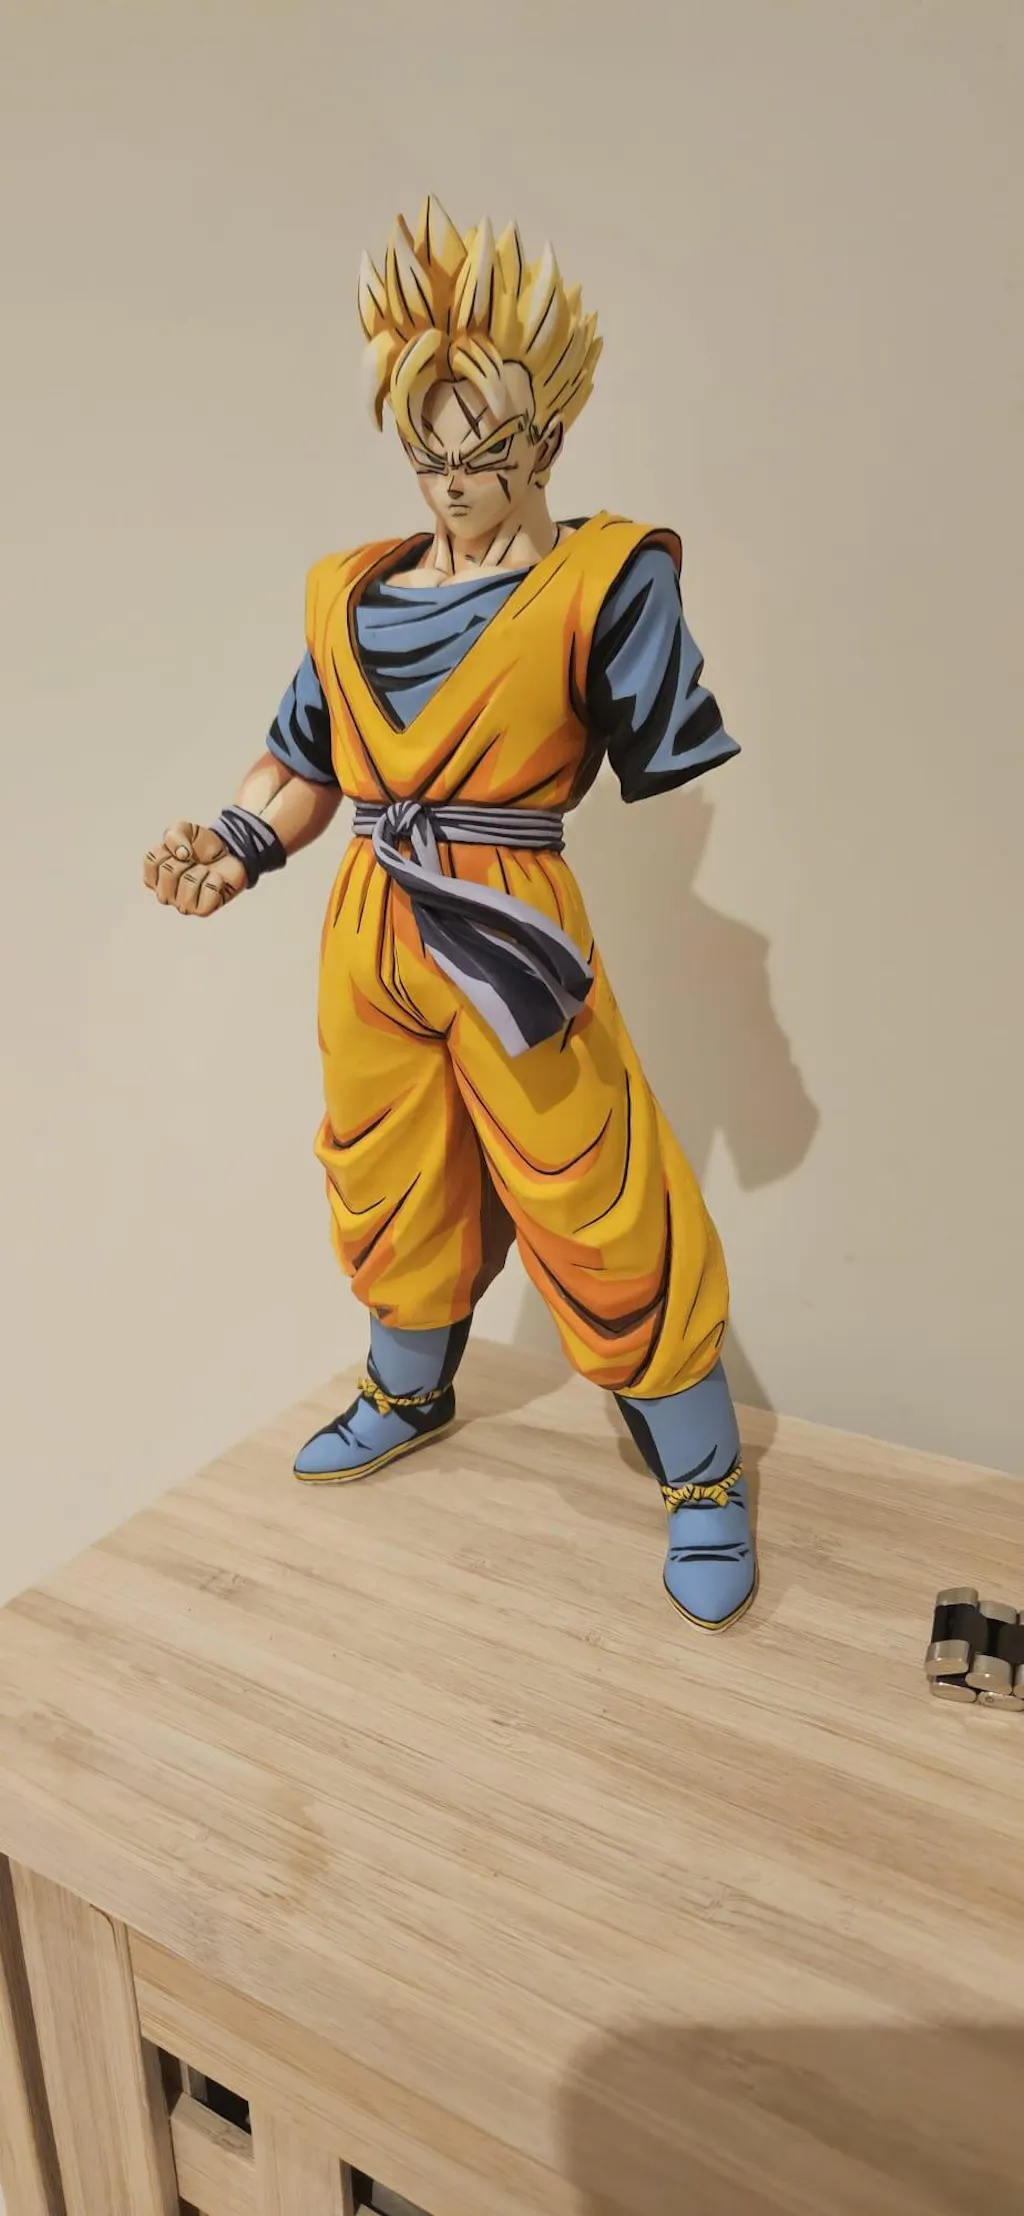
For Dragon Ball Z figures, dry brushing is most useful on hair sections — Goku's spikes, Vegeta's distinctive upward shape, Super Saiyan transformations with their layered hair segments — where it adds a sense of light catching across individual strands without requiring precise brush control on every single detail.
How to apply it:
- Load a flat or fan brush with your highlight colour
- Wipe almost all of the paint off onto a paper towel — the brush should feel nearly dry
- Drag lightly and quickly across the raised surfaces in the direction of the form
- Build up gradually with multiple light passes rather than a single heavy one
Practical tips:
- Dry brushing is a surprisingly versatile figure painting technique, especially useful when learning to paint textured hair, armour edges, and raised sculpt detail.
- Use a stiffer brush than your standard detail brushes — an old flat brush with slightly splayed bristles is ideal
- Keep the pressure light; the technique works through the paint catching on raised points, not through forcing the brush across the surface
What beginners get wrong:
- Using too much paint, which turns dry brushing into messy smearing rather than a controlled highlight effect
- The "almost dry" part of dry brushing is literal — the brush should feel barely loaded at all before it touches the figure
🎨 Technique 8: What if Figure Face and Eye Detailing?

ANSWER: Face and eye work is the technique that determines whether a Dragon Ball repaint feels premium or falls short — and it is the area most collectors look at first.
The face carries the character's personality. Vegeta's intensity, Goku's warmth, Gohan's expression during key moments — all of that lives in the face.
A well-painted body means very little if the eye work is shaky, the skin tone is flat, or the expression lacks any sense of the character behind it. Equally, even a simpler repaint can feel significantly more impressive when the face is clean, precise, and alive.
Recommended sequence for face detailing:
- White sclera: establish a clean, even white base for the eye area
- Iris colour: apply the character's specific eye colour with control
- Black pupil: place carefully, centred or slightly upward depending on expression
- Black outline: define the eye shape along the upper lid with a fine liner brush
- Specular highlight: a tiny point of lighter colour within the iris that makes the eye feel alive
- Skin highlights: subtle lighter tones on the nose bridge, cheekbones, forehead, and chin
Practical tips:
- Always work under your strongest light during face detailing — small details disappear in poor lighting
- Use your size 00 brush for all eye work and nothing else during this stage — a brush with even slight wear in the tip will make precise eye work much harder
- Anchor your brush hand against the figure stand or the desk edge for steadiness
- If a line goes wrong, let it dry completely before correcting — trying to fix wet paint almost always spreads the mistake
What beginners get wrong:
- Rushing this stage after spending significant time on the body
- The face deserves as much patience as every other technique combined
- One shaky pupil placement or a muddy eye outline undermines the entire repaint in a way that is very difficult to recover from
- Slow down here
👉 How to paint a figure - Vegeta Figure Repainting Course
Frequently Asked Questions
What are the most important figure painting techniques?
Start with base coating and washing. These two techniques alone will give your figures more depth and professionalism than any other combination at the early stage. Once those feel consistent, add layering and then move into cel-shading and edge highlighting.
Do I need an airbrush to use zenithal priming?
No. Zenithal priming can be done effectively with aerosol spray primers — one dark colour applied all over, then a light grey or white applied from directly above. An airbrush gives more control over the gradient, but it is not required to get useful results from the technique.
How long does a full Dragon Ball repaint take using these techniques?
It depends heavily on the figure size, complexity, and your current skill level. A mid-size figure worked through all eight techniques properly — priming, base coats, washing, layering, cel-shading, highlighting, dry brushing, and face work — typically takes between five and eight days across several sessions. Rushing any stage to reduce that time almost always shows in the final result.
Can these figure painting techniques be used on other anime figures, not just Dragon Ball?
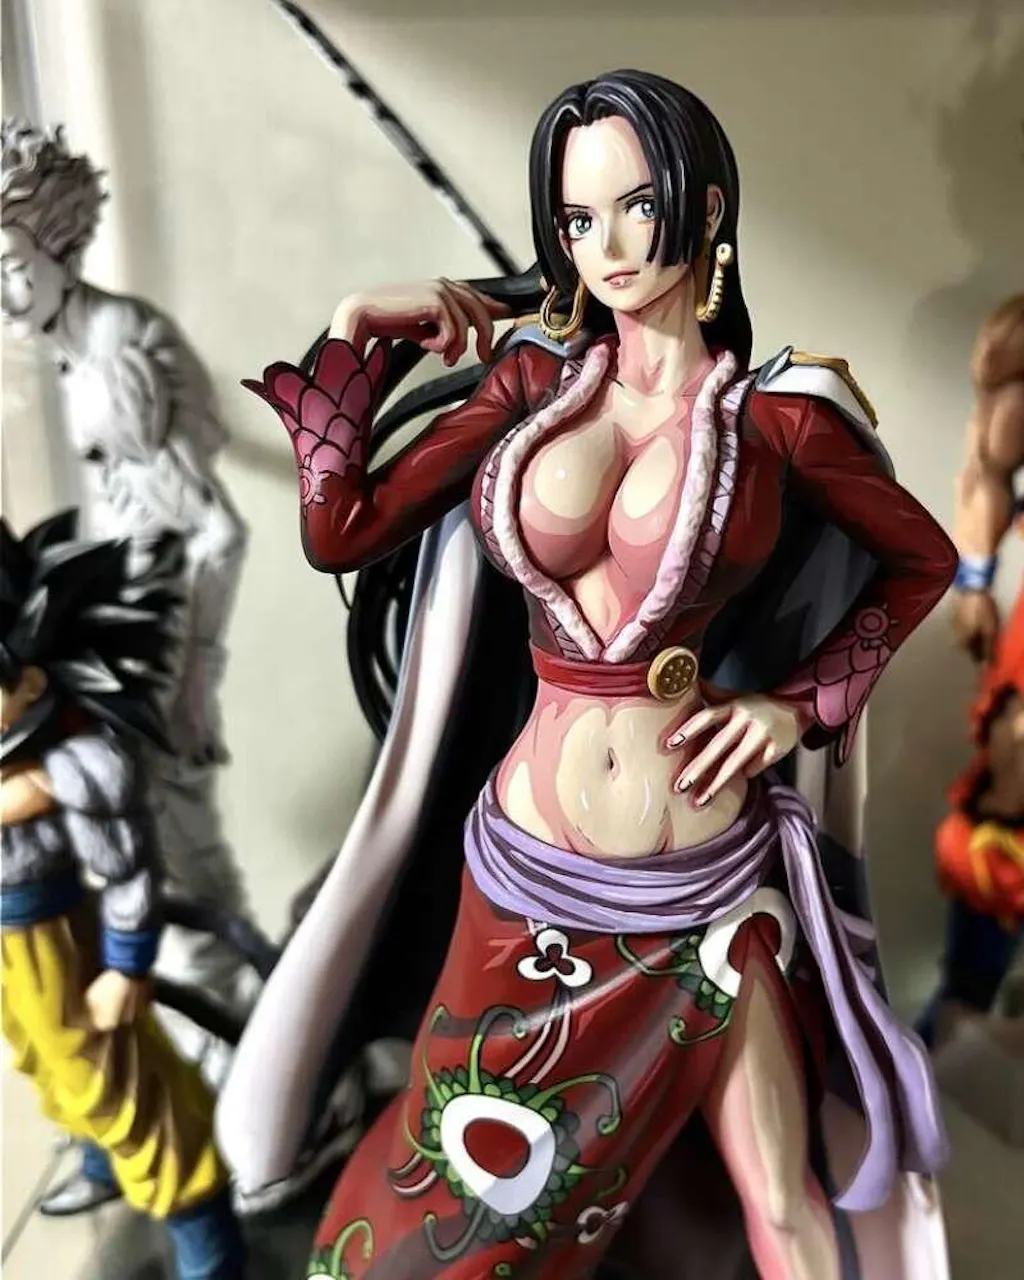
Absolutely. These techniques work across virtually all anime-style figure repaints — My Hero Academia, One Piece, Naruto, Demon Slayer, and beyond. The cel-shading and bold contrast approach is particularly well suited to any character with strong animated line work. The core methods are the same; only the colour maps and character references change.
What is the difference between washing and cel-shading?
- Washing is a wet technique where thinned dark paint flows naturally into recesses to create depth.
- Cel-shading is a deliberate, brush-applied technique where you paint defined shadow shapes with a darker version of your base colour, keeping the edges sharp and graphic.
Both add shadow and depth, but they work differently and serve different visual goals. On a complete Dragon Ball repaint, you will typically use both.
Conclusion: Figure Painting Techniques
The gap between a factory finish and a collector-quality repaint is not mystery — it is a method. Each of the eight figure painting techniques in this guide does a specific job at a specific stage of the process, from base control and shading and highlighting to face work and final texture.
None of this requires rare talent or expensive painting supplies. It comes down to patience, repetition, strong colour control, and learning how to paint with purpose figure by figure.

Share:
How to Sell Repainted Figures Online: 90-Day Start Plan
Step by Step Zenithal Priming Guide for Beginner Painters