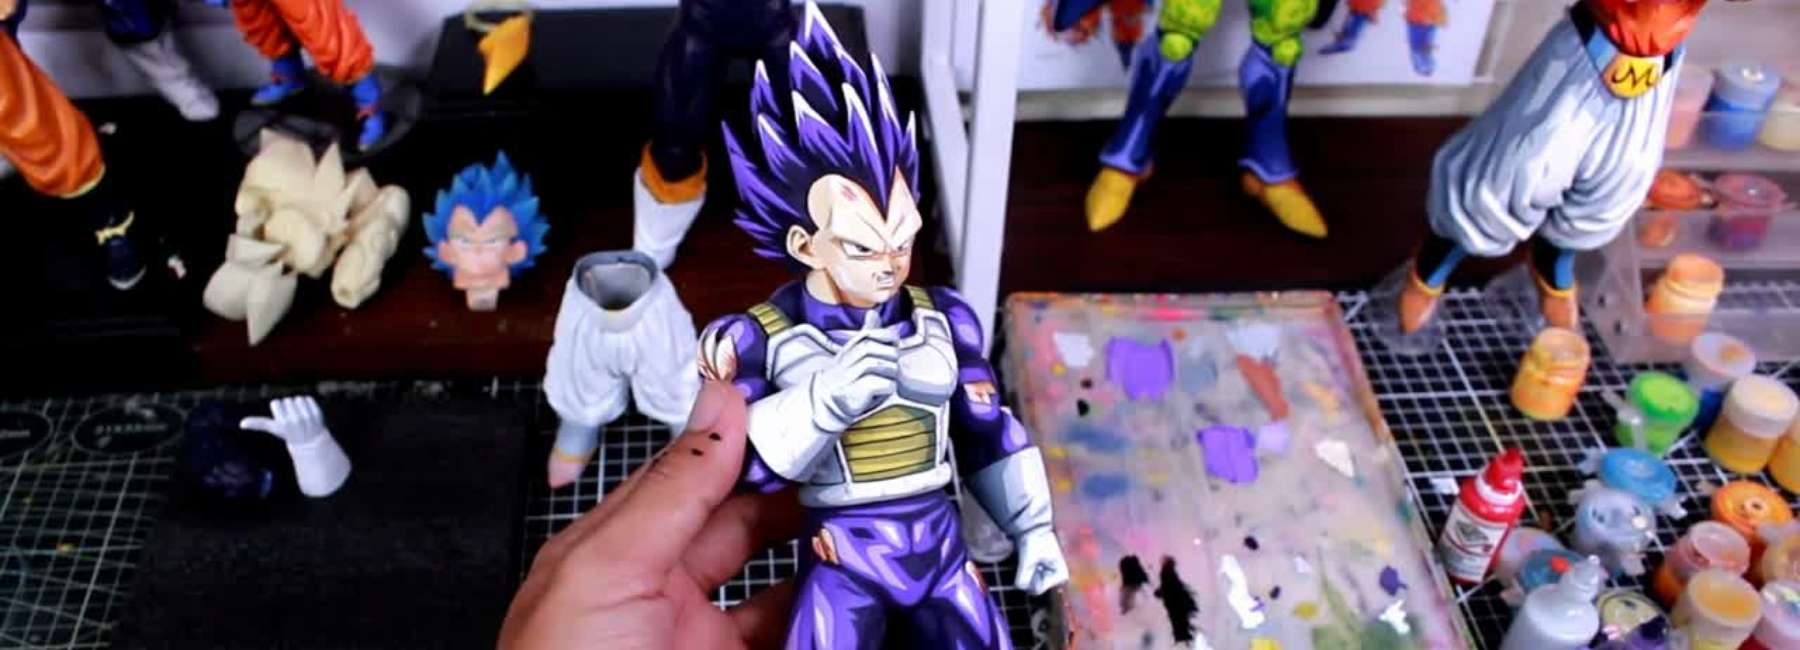
If you have ever finished washing a figure and felt like the whole piece suddenly looks too dark, too heavy, or somehow muddier than it did before, you are not doing anything wrong. That is exactly how a freshly washed figure is supposed to look.
Layering is the stage that most beginners skip or rush through, and it is also the stage that most clearly separates a flat repaint from a sculpted-looking one. Where the wash adds shadow, layering adds form. Where the wash gives recesses depth, layering gives raised surfaces presence.
Table of Contents:
- What is figure layering?
- Why layering is the stage most beginners skip?
- Tools you need for figure layering
- Understanding the role of layering in the painting process
- Step-by-step layering process
- How to apply layers cleanly?
- Common mistakes to avoid
- Layering different surface types
- Frequently asked questions
What is Figure Layering?
ANSWER: Figure layering is the technique of carefully reapplying the original base colour — and progressively lighter versions of it — to the raised surfaces of a figure after washing, while leaving the darker shaded recesses visible underneath.
Where layering sits in the painting process:
- Sits between washing and highlighting in the workflow
- Applied after the wash has darkened the figure overall
- Comes before cel-shading and edge highlighting build the brighter tones
- Acts as the bridge between shadow stages and highlight stages
How the technique works:
- The original base colour is reapplied to raised surfaces only
- The wash stays visible in every recess and along every join
- Subsequent slightly lighter layers cover progressively smaller areas
- The result is a controlled gradient from deep shadow to clean mid-tone
Why selectivity matters:
- A layer is not painted across the whole figure like a base coat
- It is applied only to muscles, armour panels, fabric peaks, and hair ridges
- The figure shows clear separation between dark, mid-tone, and lighter zones
- Without selectivity, the layer simply covers the wash and undoes the depth
What layering delivers:
- Clean colour restored to raised surfaces after washing darkened them
- The mid-tone reference point that highlights will eventually push against
- The graphic, illustrated quality that defines anime-style figures
- The structural clarity that makes a sculpted figure read clearly
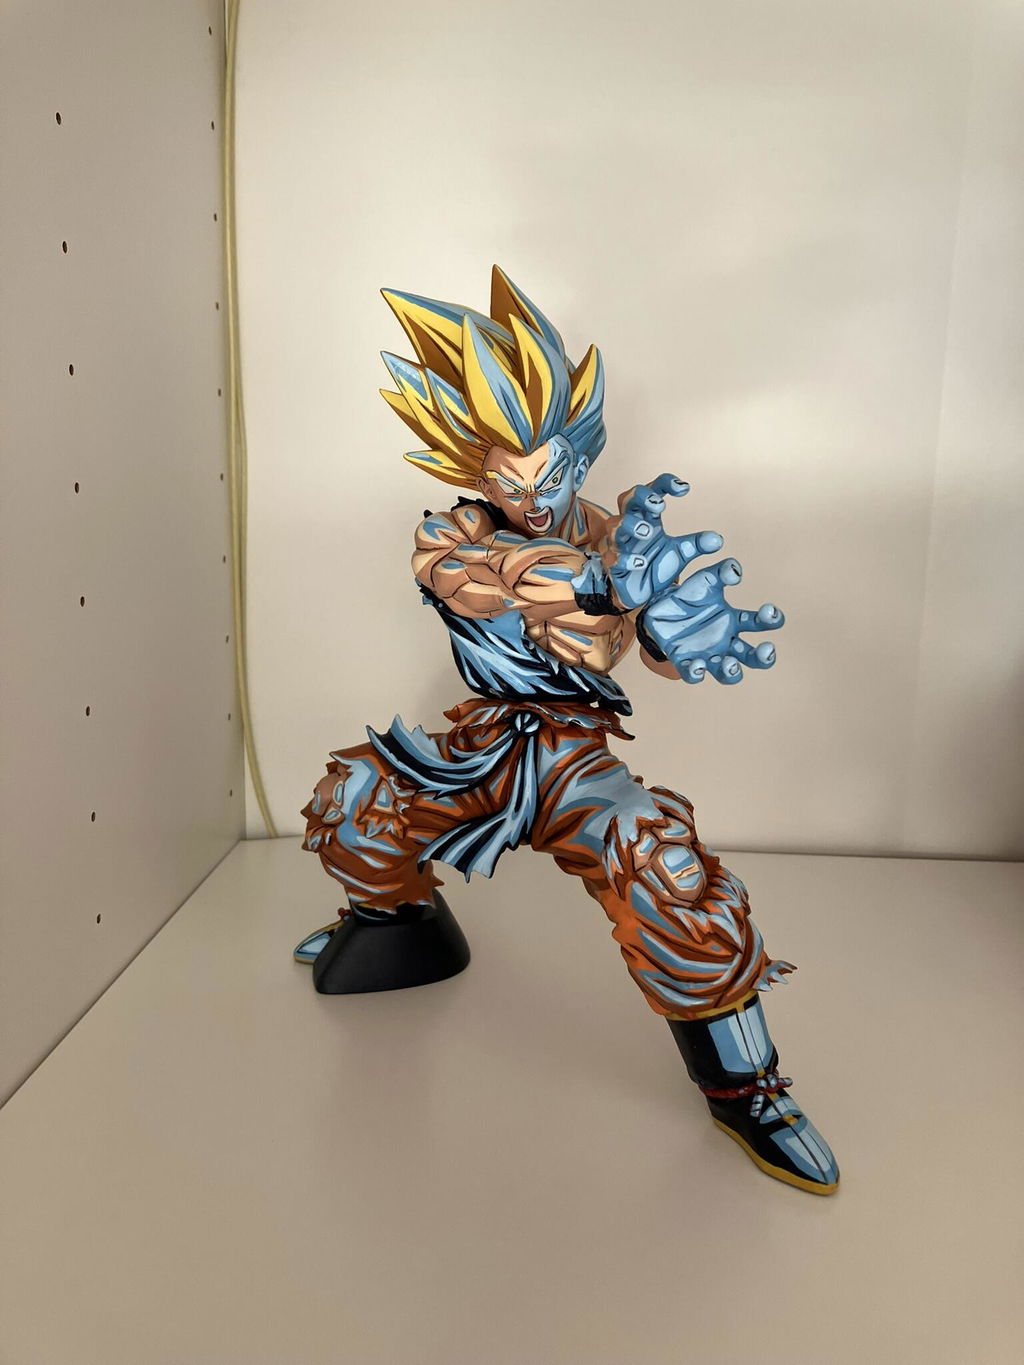
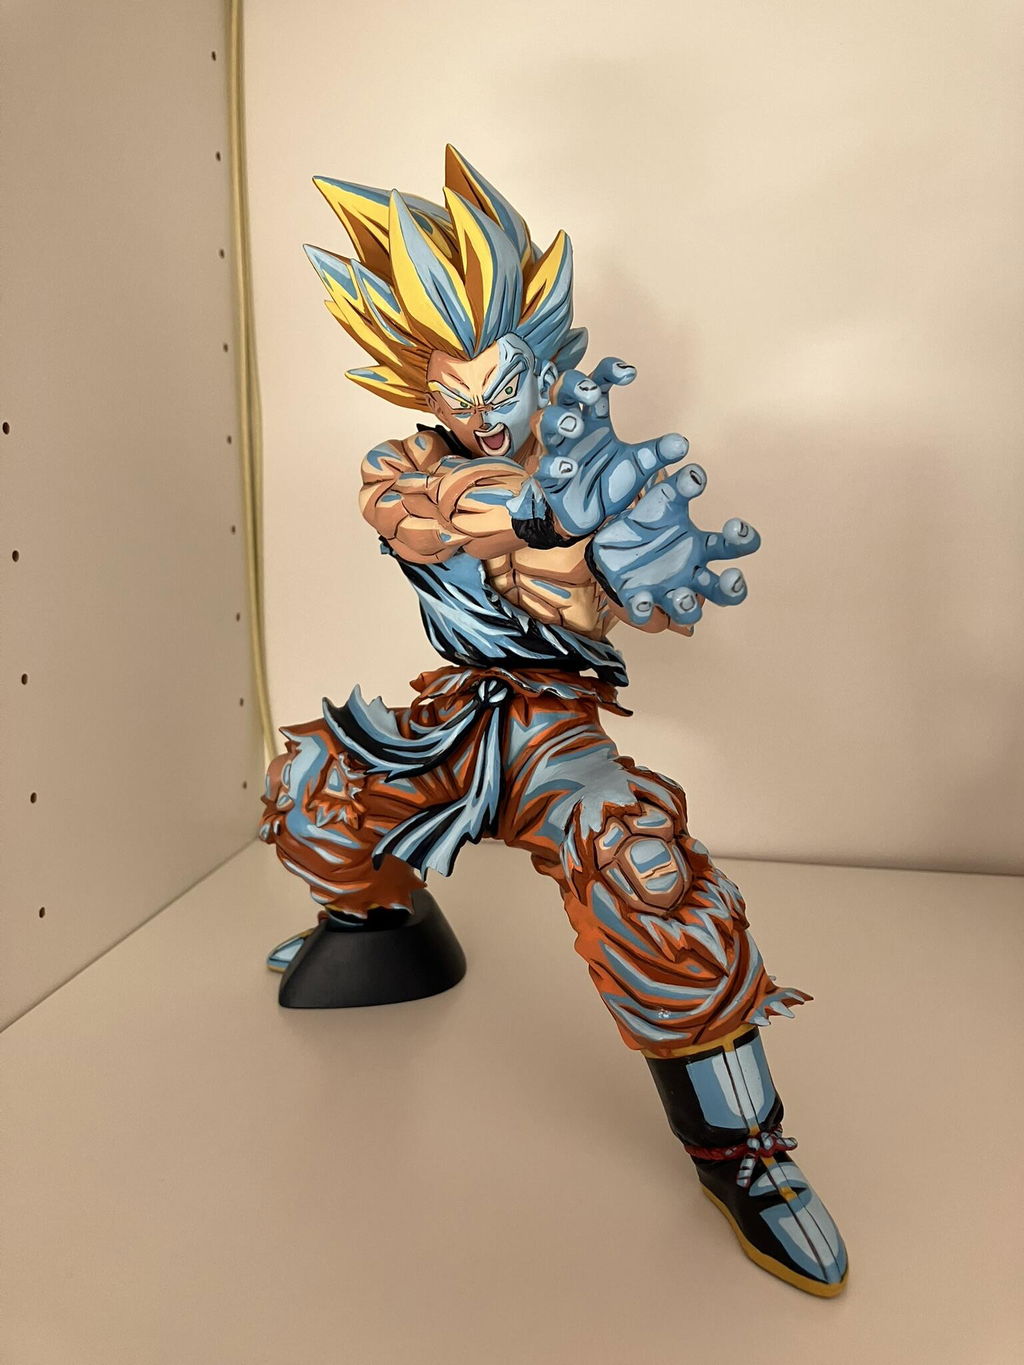
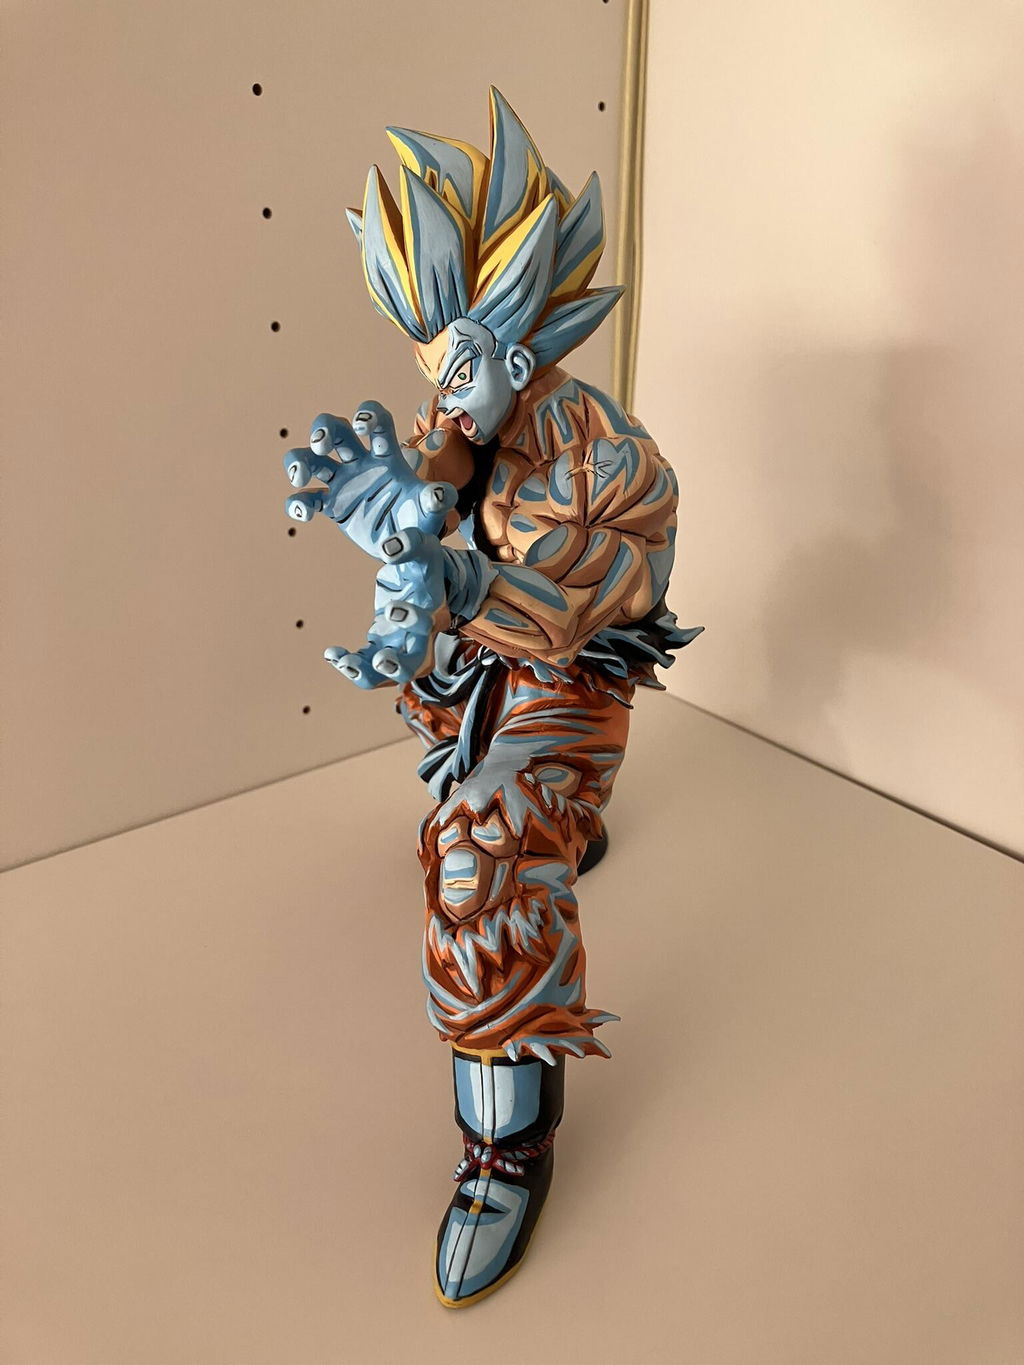
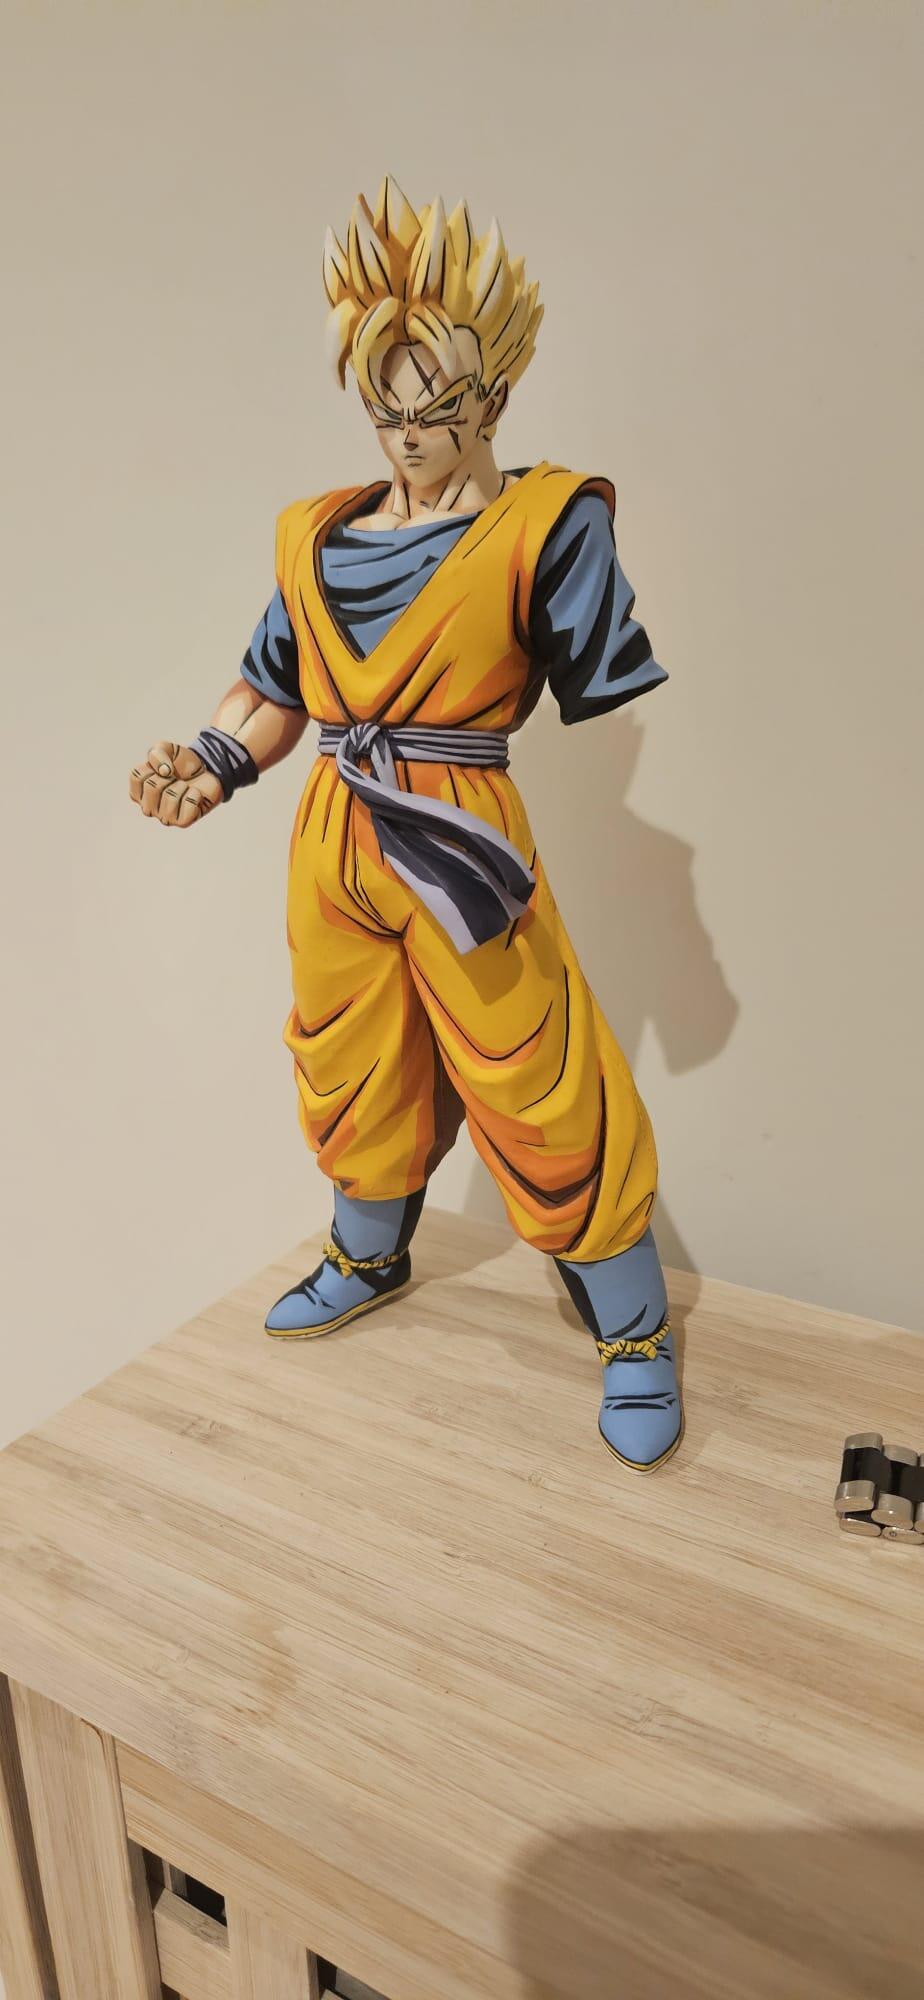
For Dragon Ball Z figures and other anime-style work, layering is what creates that clean, graphic feel where each colour reads sharply and the sculpt's structure comes through clearly. Without it, even the best base coats and washes leave the figure looking flat and one-dimensional.

Why Layering is the Stage Most Beginners Skip?
Layering is one of the most under-discussed techniques in beginner figure painting, and the reason is straightforward: it is the stage where progress feels the slowest.
- After base coating - You can see colour appearing on the figure
- After washing - You can see depth appearing
- After highlighting - You can see the figure come alive
- After layering - The figure looks slightly cleaner, slightly more defined, but the dramatic transformation does not happen until the highlights go on top.
Because of that, most beginners either skip layering entirely or rush through it in a few minutes, treating it as a quick correction stage rather than a technique in its own right. That is a mistake.
Layering does three things:
1. It cleans up the figure after washing
A wash darkens the raised surfaces unintentionally. Without layering, those darker tones stay there, and the figure looks dirty rather than shaded.
2. It establishes the mid-tone for the entire figure
The base colour brought back during layering becomes the visual reference point that the eventual highlights will push against. Without a clear mid-tone, highlights have nowhere to land — they either disappear or look out of place.
3. Creates a clean separation between shadow and mid-tone
That clear visual step from the deep wash colour to the brought-back base colour is what makes the figure look sculpted rather than coloured. It is the foundation that every later technique builds on.
If you are working through the eight core figure painting techniques, layering is the technique that quietly determines how clean and structured your final figure will look.
Tools You Need for Figure Layering
Layering uses essentially the same toolkit as base coating, with one or two differences.
Essential tools:
- The same acrylic paints you used for the base coats — exact colour matches matter for the first layering pass
- Round detail brushes — size 0 for general layering work, size 00 for precision around tight areas. A size 1 may be useful for very large flat surfaces in mini painting projects.
- Wet palette — particularly useful for layering because consistent paint thinning across multiple sessions makes the work significantly easier
- Two water pots — clean water for thinning, dirty water for cleaning
- Paper towel — for controlling moisture on the brush before each application
- Strong, neutral lighting — even more critical for layering than for base coating, because the technique relies on seeing exactly where the raised surfaces are
Practical recommendations:
- Use the same paint brand and bottle you used for the base coat. Even small differences in pigment between manufacturers can produce a slightly off colour that breaks the visual continuity
- A wet palette is genuinely close to essential for layering. The technique relies on consistent thin paint applied across multiple sessions, and a wet palette delivers exactly that
- Keep your layering brushes separate from your wash brushes — wash residue can subtly tint your layer paint and dull the colour
What to avoid:
- Using a brush larger than necessary; layering precision matters far more than coverage speed
- Mixing fresh paint each session for the same area — you will end up with subtle colour mismatches across the figure
- Worn brushes that no longer hold a clean tip; layering depends on controlled application along edges and raised surfaces
Understanding the Role of Layering in the Painting Process
Before getting into the technique itself, it helps to understand exactly where layering sits in the larger mini painting workflow.
- Stage: Priming — establishes a stable surface and, if zenithal priming is used, a baseline light map.
- Stage: Base coating — applies the foundational colour for each area.
- Stage: Washing — adds shadow and depth by allowing dark paint to settle into recesses.
- Stage: Layering — restores clean colour to the raised surfaces while preserving the wash in the recesses.
- Stage: Cel-shading or further shading — adds defined, painted shadow shapes for graphic anime contrast.
- Stage: Edge highlighting — applies the brightest tones to the sharpest edges and corners.
- Stage: Detail and face work — refines the most demanding areas.
- Stage: Sealing — protects the finished work.
Understanding this sequence matters because layering is a transitional technique. It comes after the figure has been darkened by the wash and before highlights and cel-shading brighten the figure. Its job is not to make the figure look finished — its job is to set up the stages that follow.

Step-by-Step Figure Layering Process
This is the actual workflow from washed figure to fully layered figure. Read it through once before starting.
✅ Step 1: Confirm the Wash Is Fully Dry
- Layering over a wash that is not completely dry will lift the wash, mix it with the layer paint, and undo the work entirely
- A surface-dry wash can still be soft underneath for hours
- Wait at least four hours after the final wash, ideally overnight, before starting to layer
✅ Step 2: Inspect the Figure Under Strong Light
- Before mixing paint, study the washed figure under your strongest, most neutral light
- Identify exactly where the raised surfaces sit and where the recesses and shadow lines are
- The clearer your understanding of the figure's structure, the more confidently you can apply layers
- This is not a stage where you can paint by feel
- You need to know precisely where the layer is going before the brush touches the figure
✅ Step 3: Match Your Layer Paint to the Original Base Colour
- For the first layering pass, you are reapplying the exact same base colour you used originally
- Use the same paint, the same bottle, and thin it to the same consistency you used for the base coat — slightly thinner, if anything, because layering needs more control than base coating
- If you used a custom mix for the base coat, hopefully you noted the ratios
- If not, mixing the closest match you can manage is better than guessing wildly
✅ Step 4: Identify the Raised Surfaces to Layer
Plan the session by identifying which raised surfaces need the layer applied to create a smooth pattern.
Typical layering targets on a Dragon Ball figure:
- Outer muscle peaks on chest, shoulders, biceps, and thighs can be enhanced with a translucent layer for added depth.
- Top-facing surfaces of armour plates (not the edges or the recesses between plates)
- Raised hair segments and ridges
- Top surfaces of belt sections and trim
- Outer faces of gloves and boots (excluding the seams and joins between sections)
The wash should remain visible in the recesses, joins, and edges between these surfaces, adding to the overall interior detail.
✅ Step 5: Apply the First Layer
- Load the brush lightly with thinned paint and wipe excess on the paper towel
- The brush should be loaded but not wet
- Apply the layer carefully to the raised surface only, working from the centre of the surface outward
- Stop short of the edges where the wash is visible — leaving a clear strip of wash visible around each raised surface is what creates the separation between mid-tone and shadow
- Use short, controlled strokes following the form of the surface
- Avoid scrubbing back and forth
✅ Step 6: Allow Full Drying Time
- Wait until the first layer is completely dry before applying the second
- A drying interval of 15 to 20 minutes between layers is the safe minimum
- Use that time to layer a different area or work on a different figure
✅ Step 7: Apply the Second Layer with a Slightly Lighter Mix
- The second layering pass introduces a subtly lighter version of the base colour to a smaller area within the first layer
- Mix a small amount of white — or a lighter tone of the same colour family — into your base paint
- Roughly 80% base, 20% lighter is a good starting ratio for the first lighter pass
- Apply this slightly lighter layer to the centre of the raised surfaces only, leaving the original base colour visible around the edges
- This is the start of the gradient that will eventually lead to your edge highlights
✅ Step 8: Inspect the Layered Figure
- Once everything is dry, examine the figure under your strongest light
How to Apply Layers Cleanly?
Knowing the process is one thing. The physical technique of applying a layer with control is another. This section covers exactly what your hands and brush should be doing during the layering session in the mini painting workflow.
1. Hold the figure with full rotation freedom
Mount the figure on a painting handle so you can rotate it freely as you work. Layering depends on being able to see exactly where the raised surface meets the recess, which means viewing each area from multiple angles. Static positioning makes the technique significantly harder.
2. Use less paint on the brush than feels right
Layering needs less paint on the brush than base coating does. The technique relies on precision, not coverage. A brush that is too loaded will deposit paint past the edge of the raised surface and into the recess, undoing the wash.
After loading, wipe the brush firmly on the paper towel until it feels almost dry. The right amount of paint will still flow off the tip cleanly when applied.
3. Paint inward, not outward
Always start each stroke from the centre of the raised surface and work outward toward the edge — but stop before reaching the edge.
Painting outward from the centre gives you full control over how close to the edge the layer comes. Painting inward from the edge tends to push paint into the recess, which is exactly what you want to avoid.
4. Use the side of the brush tip, not the very point
For most layering work, the side of the brush tip gives more controlled coverage than the very point. The point is reserved for edge work and small precision areas. Using the side allows you to lay down a controlled flat layer of paint without scratching texture into the surface.
5. Maintain a slow, steady rhythm
Layering is one of the techniques where speed actively works against you. A slow, steady rhythm — load, wipe, apply, lift — produces significantly cleaner results than a fast, rushed approach. There is no benefit to finishing quickly here.
6. Step back regularly to assess
Every few minutes, hold the figure at arm's length and look at it from a normal display distance. Layering is a technique that can look fine close up but show problems at a normal viewing distance. Stepping back regularly catches issues before they accumulate.
Practical tips:
- Work under your strongest light throughout the session
- Anchor your brush hand against the figure stand or your other hand for steadiness
- If the layer paint dries on the palette during the session, refresh it with a single drop of water rather than mixing fresh paint
- Take regular short breaks; layering fatigue produces shaky brush control
What beginners get wrong:
- Painting the layer like a second base coat — covering the whole surface evenly
- The point of layering is selective coverage, not full coverage
👉 Cell Shade 2D Figure Painting Course - full Vegeta repaint - 12x focused chapters
Common Mistakes to Avoid
❌ Over-layering and erasing the wash
- The single most common mistake
- Applying the layer too broadly covers the wash entirely and undoes the depth you created
- The wash should still be clearly visible in every recess and along every join after layering is complete
❌ Using paint that is too thick
- Thick layer paint catches on the surface, leaves visible texture, and tends to spread further than intended
- Layer paint should be slightly thinner than base coat paint and applied with a more lightly loaded brush
❌ Layering too soon after washing
- A wash that is not fully dry will lift when layered over
- Wait at least four hours after washing, ideally overnight
❌ Not matching the base colour exactly
- Using a slightly different paint, a different brand, or a poorly matched mix produces a layer that does not blend visually with the original base coat
- The figure ends up looking patchy
❌ Skipping the second slightly lighter layer
- The first layer brings the original base colour back
- The second slightly lighter layer creates the gradient that highlights will eventually push against
- Skipping it leaves the figure looking flat after layering.
❌ Trying to layer without strong lighting
- Layering precision depends on seeing exactly where raised surfaces meet recesses
- In poor lighting, the line between the two becomes invisible and the layer ends up in the wrong places
❌ Painting outward to the edges
- Working from the centre of a raised surface outward gives control over where the layer stops
- Working inward from the edge tends to push paint into the recess, undoing the wash
Layering Different Surface Types
Different surfaces respond to layering differently, and adjusting the approach for each gives noticeably better results.
Smooth flat surfaces (armour panels, capes, large costume areas):
- Flat surfaces show every layering inconsistency
- Use slightly more thinned paint, paint in long single-direction strokes, and stop well short of the edges to leave the wash visible
- A second slightly lighter layer applied to the centre of the panel creates a clear focal point that gives the surface dimension
Muscular surfaces (chest, biceps, thighs):
- Muscle surfaces have natural raised peaks where the layer should land and natural valleys where the wash should remain
- Layer along the top of each muscle group, leaving the valleys untouched
- This is one of the techniques where understanding human anatomy genuinely helps the painting
Hair sections:
- Hair benefits from layering applied along the top of each strand or segment, leaving the wash visible between segments
- A second lighter layer along the very top of each strand starts the highlight gradient that finishes the hair properly
Faces and skin:
- Face layering is the most demanding work in this stage
- Use a size 00 brush and apply layers carefully to the cheekbones, the bridge of the nose, the chin, and the forehead
- These layers should be subtle — face layering errors are highly visible and difficult to correct
Armour and metallic surfaces:
- Armour layering targets the top-facing panels specifically, leaving the edges and joins washed
- A second slightly lighter layer applied to the centre of each panel gives armour the visual weight and depth that makes it read as metal rather than painted plastic

Examples of Layering Techniques in Practice
Seeing how layering is actually applied to specific areas of a Dragon Ball figure makes the technique significantly easier to understand and replicate. The examples below walk through layering decisions for the most common areas of a Vegeta repaint.
Example 1: Layering Vegeta's Chest Armour
Vegeta's chest armour is one of the largest flat surfaces on the figure and one of the clearest places to demonstrate layering.
- Starting point: White Scar base coat, washed with Drakenhof Nightshade in the recesses around the armour edges, joins, and underside.
- First layer: White Scar reapplied to the centre of each armour plate. Stop the layer roughly 2-3 mm before the edge of each plate, leaving the wash clearly visible around the perimeter.
- Second layer: White Scar mixed roughly 80/20 with a tiny touch of pale grey, applied to a smaller central area within the first layer. This creates a subtle gradient from edge (washed) to centre (slightly brighter than original).
RESULT: The armour reads as solid, structured plate rather than flat white plastic. Each panel has clear edge separation, visible depth, and a focal point that catches the eye.
Example 2: Layering Vegeta's Bodysuit
The blue or purple bodysuit covers the largest single area on the figure and presents a different layering challenge.
- Starting point: Xereus Purple base coat, washed with Druchii Violet across all recesses, muscle valleys, and fabric folds.
- First layer: Xereus Purple reapplied to the raised muscle peaks — chest, biceps, thighs, calves, abs. Leave the muscle valleys, the area beneath the chest plate, and the inner thighs untouched.
- Second layer: Xereus Purple mixed with a small amount of Genestealer Purple (or a similar slightly brighter purple), applied to the highest points of each muscle group. The area covered by this lighter layer should be smaller than the first.
RESULT: The bodysuit shows clear separation between deep shadow valleys (wash), mid-tone muscle bodies (first layer), and brighter peaks (second layer). The figure now reads as anatomically defined rather than flat-colour plastic.
Example 3: Layering Vegeta's Hair
Hair is one of the most distinctive features of any Dragon Ball figure and benefits enormously from controlled layering.
- Starting point: Abaddon Black base coat with strong Nuln Oil wash flowing into the segments and lines between hair sections.
- First layer: A dark grey mix (Abaddon Black with a touch of Dawnstone) applied along the top of each hair segment, leaving the segment lines fully washed.
- Second layer: A slightly lighter grey, applied to the very top edges and ridges of each hair spike or section. This is a much smaller area than the first layer.
RESULT: The hair reads with clear segmentation, sharp definition between strands, and a sense of light catching the upper surfaces. The wash in the segment lines gives the hair its distinctive Dragon Ball look.
Example 4: Layering Vegeta's Skin
Skin is the most subtle layering work on the figure and the area most punished by mistakes.
- Starting point: Bugman's Glow or Cadian Fleshtone base coat, washed lightly with Reikland Fleshshade across all skin areas.
- First layer: The original skin tone reapplied to the cheekbones, the bridge of the nose, the forehead, the chin, and the upper chest. Leave the wash visible around the eyes, in the mouth recess, and beneath the jaw.
- Second layer: Skin tone mixed with a small amount of Kislev Flesh or a similar pale tone, applied to the very top of the cheekbones, the tip of the nose, and the centre of the forehead.
RESULT: The face shows subtle but clear dimension. The cheekbones catch light, the eye sockets sit in shadow, and the skin reads as flesh rather than painted plastic. This is the foundation that face detailing builds on.
Example 5: Layering Vegeta's Gold Chest Detail
The gold V-shaped chest piece is small but visually central to the figure and demonstrates layering on metallic surfaces.
- Starting point: Retributor Armour gold base coat, washed with Agrax Earthshade to deepen the recesses and edges.
- First layer: Retributor Armour reapplied to the raised central surface of the gold piece, leaving the wash visible along the edges and inner detail lines.
- Second layer: Retributor Armour mixed with Liberator Gold (a brighter, lighter metallic), applied to the highest raised areas of the chest piece.
RESULT: The gold reads as deliberately metallic with clear depth, sharp edges, and a sense of light catching the upper surfaces. The wash gives the recesses the dark contrast that makes gold look like gold rather than yellow paint.
Frequently Asked Questions
How many layers does a figure repaint need?
Two is usually the minimum, but three layers — base, slightly lighter, lighter still — produces noticeably better results. Each layer covers a smaller area than the one before it, building up a gradient toward the eventual highlights.
Should I layer with a wet palette or a dry one?
A wet palette is strongly preferred for layering. Consistent paint thinning across multiple sessions is critical, and a wet palette delivers that without effort.
Can I layer without having washed first?
You can, but the technique changes significantly. Without a wash, layering is mostly just creating contrast through colour selection, which is harder and produces less convincing results. The wash-then-layer combination is much easier to execute and gives stronger output.
What is the difference between layering and dry brushing?
Layering is controlled, deliberate application of paint to specific raised surfaces using the side of a regular brush. Dry brushing is a different technique where almost-dry paint is dragged quickly across raised surfaces to catch only the highest points. They produce different effects and are typically used for different stages.
How long does layering take for a full figure?
For a mid-size Dragon Ball figure, full layering typically takes between two and four hours across multiple sessions, depending on how many layers you apply. The technique rewards patience, and rushing produces visible problems.
Can I correct a layering mistake?
Yes. If a layer extends too far into a recess and covers the wash, the area can be touched up with a small targeted re-application of the wash once the layer is dry. This is one of the reasons working in stages matters — corrections are far easier when you catch problems before moving on.
Do I need to layer every area of the figure?
Most areas benefit from layering, but very small details — fine trim, individual accents, small painted symbols — often do not need it. Layering is most valuable on surfaces large enough to show a clear gradient pattern.
Conclusion: Figure Layering
Figure layering is the technique that quietly does the most structural work in a repaint. It does not produce the dramatic visual upgrade that highlights or cel-shading deliver, but without it, those later techniques cannot land properly. It is the foundation that gives every following stage somewhere to push against.
The technique is not difficult. It rewards patience, controlled application, and the discipline to leave the wash visible in the recesses while bringing colour back to the raised surfaces. Two or three thin layers, applied selectively with a slightly lighter mix each pass, produce the clean separation that defines a structured, sculpted-looking figure.
Share:
Step-by-Step Figure Washing Tutorial for Paint Beginners
Step-by-Step Figure Cel Shading Guide for Beginner Artists