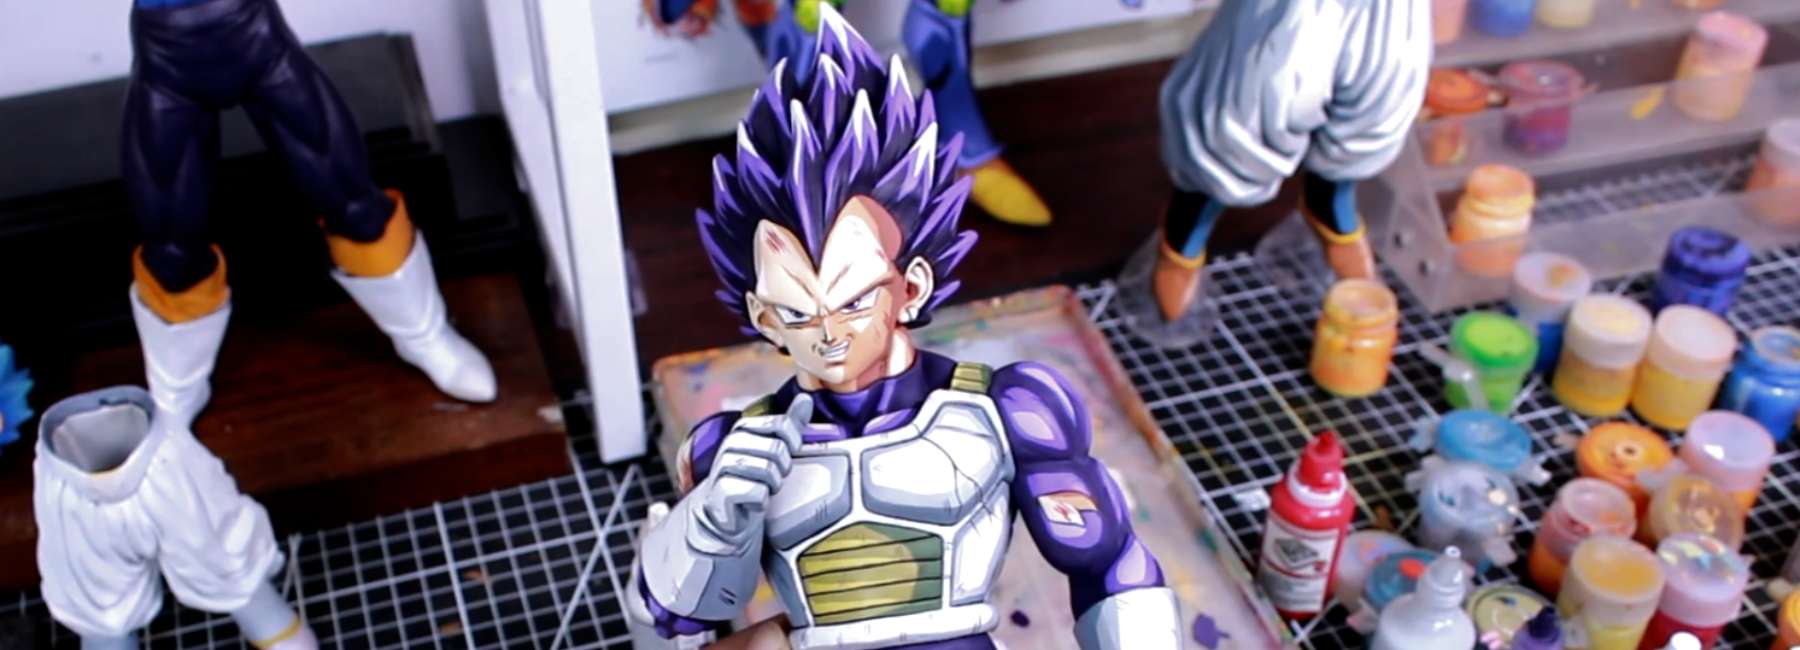
If your repaints look flat, even though the colours are right and the base coats are clean, the missing piece is almost always proper depth and shading. A figure can have perfect base coat coverage and still look like a plastic toy — because without shadow, the sculpt's depth has nowhere to read from.
Figure washing and shading is the technique that fixes this. It is the stage where a base-coated figure starts to feel three-dimensional, where muscles look like muscles, where armour looks like armour, and where the whole piece begins to look like something a collector would actually want on their shelf.
Table of Contents:
- What is figure washing and shading?
- Why washing transforms a repaint?
- Tools you need for figure washing
- Understanding wash consistency
- The Washing Process: Start to Finish
- How to Apply a Wash to a Figure?
- Targeted shading vs. all-over washing
- Common mistakes to avoid
- Washing different surface types
- Frequently asked questions
What is Figure Washing and Shading?
ANSWER: Figure washing and shading is the technique of applying highly thinned, darker-toned paint to a base-coated figure to create depth, separation, and three-dimensional structure by allowing paint to settle into the recesses and shadowed areas of the sculpt.
How the technique physically works:
- Thinned paint is applied to a surface and flows by gravity and capillary action
- Paint flows away from raised areas and pools in recesses
- The wash settles between muscles, inside fabric folds, around armour edges, and beneath the chin
- Once dry, the darker recesses give the figure visible depth
The two main forms of the technique:
- All-over washing — the entire figure is coated and the wash settles naturally everywhere
- Targeted shading — the wash is applied only to specific recesses with controlled brush placement
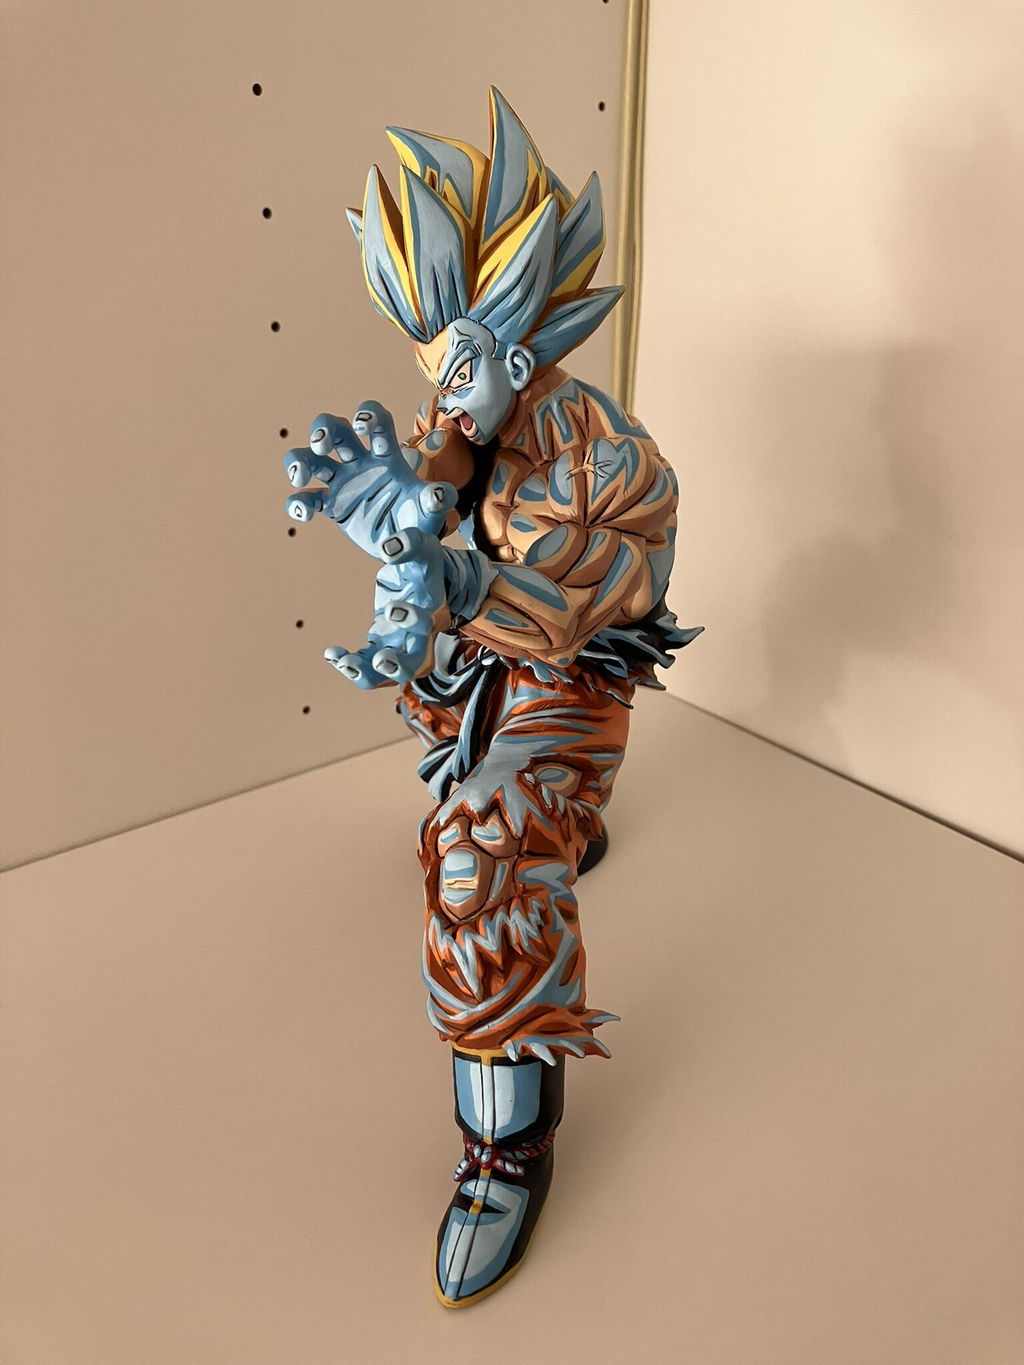
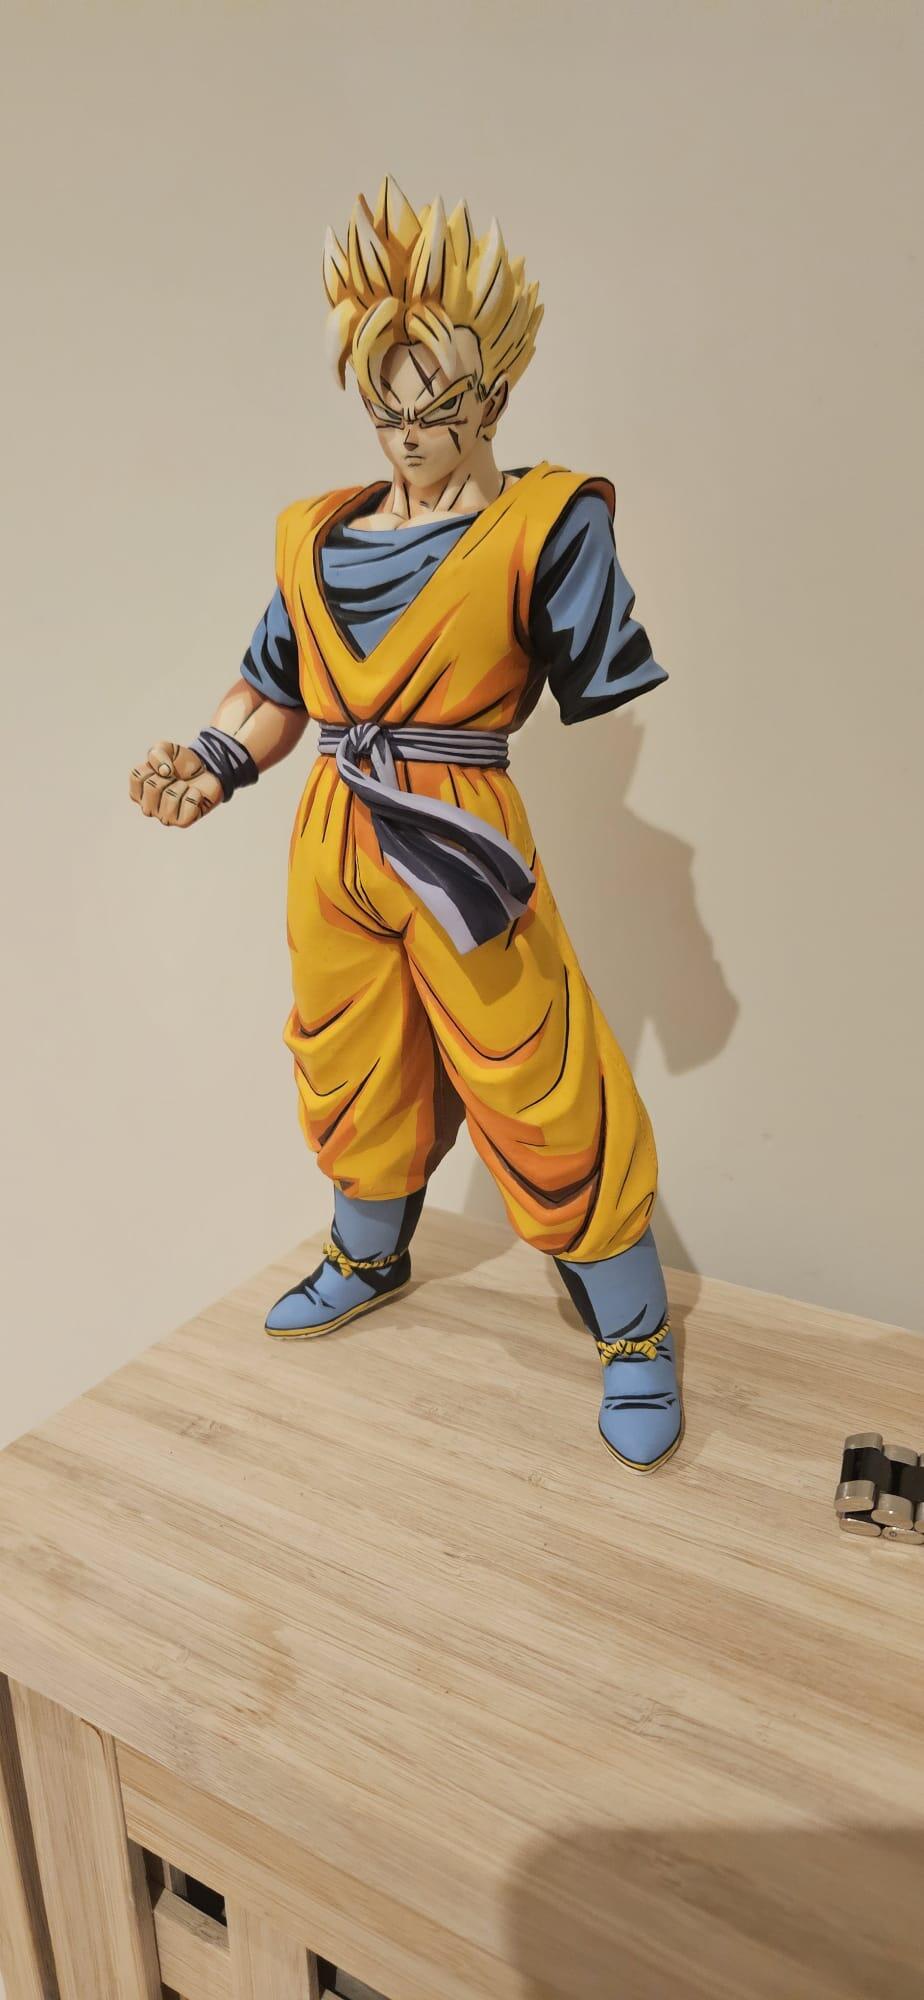
Most strong repaints use a combination of both e.g for Dragon Ball figures and other anime-style work, washing is what allows the bold base colours to read properly against deep shadow.
What washing delivers:
- Depth where the base coat alone produced flatness
- Clear separation between sections of the figure
- A foundation that makes layering, cel-shading, and highlighting easier
- The first stage where the figure starts to feel sculpted rather than coloured

Why Washing Transforms a Repaint?
Washing does three things that nothing else in the painting process can do as efficiently.
1. It creates depth where there was none
- A base-coated figure shows the character's colours but not the character's structure
- Washing pushes the recesses into shadow, which immediately makes the raised areas look raised
- Muscles gain shape
- Armour gains weight
- Clothing gains realistic folds
- The figure stops looking like coloured plastic and starts looking like a proper sculpted piece
2. It defines separation between sections
- Where two areas of a figure meet — the edge of a glove against an arm, the join between armour and bodysuit, the line where hair meets skin — a wash settles into the gap and creates a clean visual break
- This separation makes the figure read clearly from any distance, which matters enormously for display and photography
3. It accelerates everything that follows
- Layering, cel-shading, and edge highlighting all rely on having clear shadow areas to push against
Without a wash, those techniques have to do double the work — both creating shadows and creating highlights. With a properly applied wash, the shadows are already in place, and the later techniques can focus purely on building contrast and refining the figure.
For new painters working through the eight core figure painting techniques, washing is the stage that delivers the biggest visible upgrade for the smallest investment of skill.
Tools You Need for Figure Washing
Washing does not require many tools, but the ones you do use need to be right for the job.
Essential tools:
- Pre-mixed washes or shade paints — Citadel Shades are the most reliable starting point. Army Painter Quickshade Washes are a budget-friendly alternative
- Wash brushes — soft round brushes in size 1 or 2, kept separately from your base coating and detail brushes
- A clean, slightly damp brush for cleaning excess wash from raised surfaces before it dries
- Paper towel for removing excess wash from your brush before applying
- A wet palette or ceramic palette — useful if you want to thin your washes further or mix custom shades
- A figure holder — essential, because the figure will need to be rotated during application
Practical recommendations:
- Pre-mixed Citadel Shades are far easier for new painters than mixing their own washes from scratch. They are formulated specifically to flow correctly into recesses and dry without leaving tide marks
- Keep dedicated wash brushes separate from your base coating brushes — washes can stain bristles and affect colour reproduction in later painting stages
- A second clean brush, kept slightly damp throughout the session, is invaluable for removing wash from areas where it pooled unintentionally
What to avoid:
- Using thinned standard acrylic paint as a wash; it does not flow the same way and tends to leave hard tide marks on flat surfaces
- Using your best detail brushes for washing — they will lose their tip faster from the heavier handling
- Cheap unbranded washes that have not been formulated for figure work; they often dry inconsistently and can leave a chalky residue
Understanding Wash Consistency
The single biggest factor in whether a wash works or fails is consistency. A wash that is too thick covers everything in dark colour rather than settling into recesses. A wash that is too thin disappears entirely and does nothing.
1. The right consistency:
A properly mixed wash should flow off the brush easily and settle into recesses on its own without needing to be pushed. It should be roughly the consistency of milk — noticeably thinner than standard paint but with enough pigment to leave clear darkening in the areas where it pools, enhancing the overall gloss of the mini.
2. Pre-mixed washes:
Citadel Shades, Army Painter Washes, and similar products come pre-thinned to the correct consistency. For most uses, you can apply them straight from the pot without any further adjustment.
If you find them slightly too dark for the figure you are working on, you can thin them with a small amount of water or a dedicated wash medium. Never thin pre-mixed washes too aggressively, as it breaks down the surface tension that allows them to flow properly.
3. Mixing your own:
If you want to mix your own wash from standard acrylic paint, the typical ratio is roughly 1 part paint to 4 or 5 parts water, with a small amount of flow improver or matte medium added to help the wash break surface tension and flow into recesses.
This takes practice to get right and is generally not recommended for beginners until they have used pre-mixed washes for several figures first.
Practical tips:
- Always test the consistency on a hidden area or a spare part before committing to the full figure
- Wash consistency can change as the wash dries on the palette — refresh it with a small drop of water if it starts to feel sluggish, ensuring it remains effective for your tabletop projects.
- Different surface types respond differently to wash consistency; flat areas need slightly thicker washes, recessed areas accept thinner ones
👉 Learn to Repaint - Figure Painting Course
The Washing Process: Start to Finish
This is the structural workflow — what happens at each stage of a washing session, in what order, and why. The next section covers the physical technique of how to actually apply the wash itself.
✅ Step 1: Confirm the Base Coats Are Fully Dry
This stage is non-negotiable. Applying a wash over base coats that are not completely dry causes the underlying paint to lift, blend with the wash, and create muddy, inconsistent colour. Wait at least an hour after the final base coat layer, ideally longer. If you have any doubt, wait longer.
✅ Step 2: Plan Where the Wash Will Go
Before opening the wash pot, decide which areas need washing and which do not. A targeted approach almost always produces better results than blindly washing the whole figure.
Typical wash targets on a Dragon Ball figure:
- All skin areas (face, neck, arms, hands)
- Bodysuit recesses (under armpits, between muscles, in fabric folds)
- Armour edges and underside surfaces
- Hair recesses between segments
- Boot and glove inner surfaces
- Belt and accessory recesses
Some areas — flat armour faces, smooth hair tops, raised muscle peaks — may not need washing at all, or may need only a very controlled targeted application.
✅ Step 3: Match the Wash Colour to the Base
Each wash colour pairs best with specific base colours. The wrong wash over the wrong base will produce muddy, off-colour shadows that fight the rest of the figure rather than supporting it.
Recommended pairings for Dragon Ball repaints:
- Reikland Fleshshade over all skin tones — gives warm, realistic depth without making the skin look dirty
- Druchii Violet over purple bodysuit areas like Vegeta's costume
- Drakenhof Nightshade over blue areas
- Nuln Oil over black, dark grey, dark armour, and boots
- Agrax Earthshade over gold, bronze, brown, and tan details to create a striking contrast in your paint job
- Carroburg Crimson over red areas
✅ Step 4: Work in Small Sections
Apply the wash to one area at a time rather than the whole figure in one pass. A small section gives you the time to clean up any unintended pooling before the wash dries. Trying to wash the entire figure at once means too much surface to manage and almost guarantees tide marks somewhere.
A reasonable section might be:
- One side of the face
- A single armour panel
- One shoulder and arm
- The hair as a single section
- One leg or boot
Apply, clean up the excess on raised surfaces, and only then move on to the next section.
✅ Step 5: Allow Full Drying Time
Once washing is complete, the figure needs to be left alone. Drying time varies by wash brand and humidity, but expect at least two to four hours for safety. Many painters leave washes overnight to be sure.
While the wash is drying, do not touch the figure, as this can disrupt the ink application. Wet wash is sensitive to disturbance and can be lifted by a careless thumb against the surface.
✅ Step 6: Inspect Under Strong Light
Once the wash is fully dry, examine the figure under your strongest, most neutral light.
A correctly washed figure should show:
- Clear, defined shadows in all recesses and joins
- Visible depth that was not present before the wash
- Clean, untouched colour on raised surfaces
- No tide marks or streaks where the wash pooled unintentionally
- A sense that the sculpted form has come alive
Any tide marks or unwanted pooling can be corrected at the layering stage that comes next.
✅ Step 7: Decide Whether a Second Wash Is Needed
A single wash is often enough, but some figures benefit from a second targeted pass to deepen specific areas. Once the first wash is fully dry, look at the figure critically. If the recesses you washed are not as deep as you wanted, apply a second targeted wash only to those specific areas — never the whole figure again.
Two thin, controlled washes always produce better results than one heavy wash trying to do everything in a single pass, and they create smoother transitions between the deepest shadows and the surrounding base coat.
How to Apply a Wash to a Figure?
Knowing the workflow is one thing. Actually applying a wash to a figure with control — without flooding the surface, leaving tide marks, or losing your base coat to lifting — is a different skill.
This section breaks down the physical act of applying a wash so you know exactly what your hands should be doing throughout the process.
1. Hold the figure or miniature correctly
- Mount the figure on a painting handle or hold the base firmly in your non-dominant hand
- You need to be able to rotate the figure freely as you work, because washes flow with gravity
- The angle of the figure determines where the wash settles, and being able to tilt the figure quickly is one of the most important parts of controlling the wash
2. Use gravity to direct the wash
- Before applying the wash, tilt the figure so the recess you want to fill sits at the lowest point of the area you are working on
- Gravity will pull the wash naturally into that recess
- If you are washing under the chin, tilt the head slightly back
- If you are washing inside an armour overlap, tilt the figure so the overlap faces downward
- Working with gravity rather than against it makes the wash settle exactly where it should with very little effort
3. Load the brush properly
- Dip the brush halfway into the wash pot and then wipe one side of the brush against the rim
- This removes the excess wash from one side while leaving the other side loaded
- The aim is a brush that holds enough wash to flow smoothly off the tip but not so much that it drips when you move it toward the figure
4. Touch, do not stroke
- A wash is applied by touching the brush to the recess and letting the wash flow off the tip on its own — not by brushing it across the surface like a base coat
- Place the loaded brush gently against the edge of the recess
- The wash will be drawn off the brush by the surface tension of the area and flow into the recess naturally
- Lift the brush away once the wash has transferred
- There is no scrubbing, no painting, no back-and-forth motion at this stage
- The brush is a delivery tool, not a painting tool
5. Have your clean brush ready in your other hand
- The clean, slightly damp brush is your cleanup tool and it should be in your other hand throughout the entire session
- The moment you notice wash pooling on a flat or raised surface where it should not be, drag the clean brush gently across that surface
- The clean brush picks up the excess wash without disturbing the wash that has settled correctly into recesses
- This single habit prevents almost every tide mark a beginner is likely to encounter
5. Adjust consistency as you go
- Wash consistency changes during a session as it sits in the pot or on your palette
- If the wash starts to feel sluggish or stops flowing smoothly into recesses, refresh it with a single small drop of water and remix
- If the wash is flooding too easily and covering everything, the consistency may be too thin — let it sit for a few minutes to thicken slightly, or load less onto the brush
6. Read the wash while it is wet, but trust it when it dries
- The instinct, especially for beginners, is to keep working a wash until it looks "finished" while still wet
- The problem is that washes look much darker when wet than when dry
- A figure that looks heavily washed during application often looks subtly perfect once dry
- Apply the wash with restraint, let it dry fully, and assess the result before deciding whether to add more
- A second targeted wash is always an option
- Removing an over-applied wash is much harder
Practical tips:
- Work under your strongest light throughout the session — wash mistakes are almost invisible in dim lighting and obvious once the figure is photographed
- Keep paper towel within reach to clean your brush between sections
- If you make a mistake and the wash has not yet started to dry, a clean brush moistened with clean water can lift most of it cleanly
- Practise the touch-don't-stroke motion on a spare or test piece before applying it to a figure you care about
What beginners get wrong:
- Treating a wash like a base coat and brushing it across the surface rather than letting it flow
- A wash works through gravity and surface tension, not through painting
- Once you understand that the brush is just a delivery tool — not a painting tool at this stage — your washes will land cleanly with significantly less effort

Targeted Shading vs. All-Over Washing
There are two main strategies for applying washes, and knowing when to use each one is part of what separates clean repaints from messy ones.
1. All-over Washing
The figure is washed across most of its surface, with the wash flowing into recesses naturally and being cleaned from raised areas afterwards. This approach is faster and works well on figures with strong sculpted detail where you want overall depth across the whole piece.
It also works well as a first wash, with targeted shading applied afterwards for specific areas that need more emphasis.
2. Targeted Shading
The wash is applied only to specific recesses, joins, or shadow points using controlled brush placement to add shading exactly where the sculpt calls for it. The wash is guided directly into the recess and not allowed to spread to the surrounding areas.
This approach gives much more control and is ideal for figures with smooth, flat surfaces where an all-over wash might leave tide marks. It is also the right choice for face work, where every wash placement matters and there is no margin for cleanup error.
Combining Both
Most strong repaints use both. An all-over wash establishes the broad shadow structure, then targeted shading deepens specific areas — beneath the chin, inside armour overlaps, between hair segments — that need more emphasis than the all-over wash provided.
For Dragon Ball figures specifically, a combined approach works particularly well. The bodysuit and skin can take an all-over wash to establish broad depth, while targeted shading on the armour edges, hair recesses, and face provides the sharper definition the character needs.
Common Mistakes to Avoid
❌ Applying too much wash
- The single most common mistake
- Excess wash floods raised surfaces, leaves tide marks, and produces a dirty, muddy figure rather than a deep, structured one
- Always wipe excess from the brush before applying
❌ Not removing pooled wash from flat surfaces
- Wash that pools on flat surfaces and is left to dry creates hard tide marks that are very difficult to fix later
- A clean, slightly damp brush should be in your other hand throughout the wash session for exactly this reason
❌ Using the wrong wash colour for the base
- Reikland Fleshshade over a blue area, Druchii Violet over skin, or Nuln Oil over gold all produce muddy, off-colour shadows that fight the rest of the figure
- Match the wash to the base colour family
❌ Washing over wet base coats
- Base coats that are not fully dry will lift when a wash is applied over them, mixing with the wash and creating inconsistent colour
- Wait at least an hour after the final base coat, longer if possible
❌ Trying to fix mistakes while wet
- If a wash pools where it should not, the instinct is to scrub it away immediately. This usually makes things worse
- A clean, damp brush dragged gently across the surface lifts the excess without disturbing the wash that has already settled correctly
❌ Skipping the drying time
- Layering, highlighting, dry brushing, or any further work over a wash that is not fully dry will lift the wash, mix it with the new paint, and undo the work entirely
- Wait the full drying interval before moving on
❌ Washing the entire figure at once
- A single all-over wash applied to the whole figure in one pass means too much surface to clean up before the wash dries
- Work in sections. Apply, clean, move on
Washing Different Surface Types
Different surfaces respond to washing in different ways, and adjusting the technique for each gives noticeably better results.
Smooth flat surfaces (armour panels, capes, large costume areas):
- Flat surfaces are the most likely to develop tide marks because there are no recesses for the wash to settle into
- Apply targeted shading along edges and joins rather than washing the surface itself. Keep your clean brush ready to lift any pooling immediately
Highly textured surfaces (hair, fur, fabric folds):
- These surfaces are washing-friendly because the texture itself creates plenty of recesses for the wash to settle into
- Apply more generously here, allowing the wash to flow naturally between strands and folds. Less aggressive cleanup is needed because the texture absorbs the wash naturally
Faces and skin:
- Face washes need the most precision. Use a smaller brush, apply the wash in tiny controlled placements, and clean up immediately
- Wash should settle in eye sockets, beneath the nose, around the chin, and into mouth recesses
- Avoid washing over flat skin areas — they should remain clean for highlighting later
Armour and metallic surfaces:
- Armour usually has a combination of flat panels and defined edges or joins
- Target the edges and joins specifically rather than washing the panel surfaces
- This produces clean armour with sharp shadow definition rather than dirty-looking metal
Hair:
- Hair benefits enormously from washing
- The natural segmentation of anime hair sculpts gives the wash plenty of places to settle
- Apply the wash generously across the whole hair area and let it find the segment lines on its own
- Clean lightly from the top surfaces and let the depth do the rest
Frequently Asked Questions
What is the difference between a wash and a shade in a paint job?
In most modern figure painting contexts, the terms are used interchangeably. Citadel calls their products "Shades" while Army Painter calls theirs "Washes" but they perform the same function. Both refer to thinned, dark-toned paints designed to flow into recesses and create shadow.
Do I need different washes for different colours?
Ideally yes. A single wash colour does not pair well with every base colour. Reikland Fleshshade for skin, Nuln Oil for dark areas, and Agrax Earthshade for browns and metallics will cover the majority of figures, but expanding your wash colour range gives noticeably better results across more figure types.
Can I make my own washes?
Yes, by thinning standard acrylic paint with water and a small amount of flow improver or matte medium. The typical ratio is 1 part paint to 4 or 5 parts water with a drop or two of flow medium. However, this takes practice to get right, and pre-mixed washes are significantly easier for beginners.
How long should I wait after washing before continuing the figure?
Minimum two to four hours, ideally overnight. Washes look surface-dry quickly but can still be soft underneath for hours afterwards. Layering or highlighting over a soft wash will lift the wash and ruin the work.
Why does my wash leave tide marks on flat surfaces?
Tide marks are caused by wash pooling on flat areas and drying without being cleaned up. The fix is twofold: apply targeted shading rather than all-over washing on flat surfaces, and keep a clean, slightly damp brush ready to lift excess wash before it dries.
Can I apply more than one coat of wash?
Yes. Multiple thin wash coats often produce better, more controlled results than one heavy coat. Apply the first wash, let it dry completely, assess where you want more depth, and apply a second targeted wash to those specific areas only.
Will washing affect the colour of my base coats?
Slightly, yes. The wash will tint the colour underneath, particularly on lighter base coats. This is why the layering stage that follows is so important — it brings the original base colour back to the raised surfaces while leaving the wash visible in the recesses.
Conclusion: Figure Washing and Shading
Figure washing and shading is the stage that turns a base-coated figure into something that genuinely looks three-dimensional. It is one of the highest-value techniques in the entire repaint process, and once you have applied it correctly on two or three figures, the difference it makes will be immediately obvious in everything you paint afterwards.
The technique itself is not difficult. It rewards patience, controlled application, and the discipline to clean up excess before it dries. Use the right wash for the right basecoat colour, apply in sections, keep a clean brush ready, and let each wash dry fully before moving on for a brighter finish.

Share:
Step by Step Figure Base Coating Guide for Beginner Artists
Step-by-Step Figure Layering Guide for Beginner Painters