The ideal acrylic paint consistency for airbrushing is roughly the viscosity of skim milk. For most standard hobby acrylics, a 1:1 ratio of thinner to paint is the right starting point, with adjustments based on the specific paint brand, nozzle size, and ambient conditions.
Mixing outside the airbrush cup, testing before applying, and using a dedicated thinner over plain water all separate clean professional results from frustrating clogs.
Painters who get it right produce smooth base coats, clean detail work, and figures that look studio-finished. Painters who get it wrong fight clogs, tip dry, orange peel, and spider-webbing on every session, often blaming their airbrush, their compressor, or their paint when the actual issue is the mix.
Table of Contents:- Why paint consistency makes or breaks airbrushing?
- Choosing the right thinning agent
- The skim milk rule and how to read consistency
- Common thinning ratios for different paint types
- How nozzle size affects your ratio?
- PSI tuning and how it interacts with thinning
- The mixing workflow professional painters use
- How to test your mix before you spray?
- Environmental factors that change your ratio
- Troubleshooting common airbrushing issues
- Pro recipes and studio mixes
- Frequently asked questions
Why Paint Consistency Is Your Secret to Success?
An airbrush is a precision instrument. The nozzle openings on most hobby airbrushes range from 0.2mm to 0.5mm. Paint particles, pigment binders, and any clumps significantly larger than the nozzle opening will either clog the nozzle entirely or pass through unevenly.
Thick paint produces three specific problems:
- Immediate clogging — paint blocks the nozzle and stops spraying entirely
- Sputtering and pebbly finish (orange peel) — paint reaches the surface as semi-dry droplets that fail to level
- Loss of fine control — detail work becomes impossible because the paint cannot atomise properly
Over-thinned paint produces an equally specific set of problems:
- Weak coverage — pigment density too low to cover in a reasonable number of coats
- Runs and pooling — paint flows on the surface rather than settling
- Spider-webbing — paint spreads in thin, uncontrollable lines on contact
The goal sits between these two failure modes. Paint thin enough to atomise cleanly, thick enough to hold its form on the surface. That is what skim milk consistency delivers.

Choosing the Right Thinning Agent
💡 Distilled water
- How it behaves: reduces viscosity, can weaken binder if overused
- Best for: light thinning, practice work, paints already close to ideal consistency
💡 Brand-specific thinner (Vallejo Airbrush Thinner, Tamiya X-20A)
- How it behaves: matches binder chemistry, maintains paint integrity at heavy thinning
- Best for: professional work, critical projects, brand-loyal painters
💡 Universal airbrush thinner
- How it behaves: works across multiple paint brands, often includes flow improver
- Best for: mixed studios using several paint brands
💡 Flow improver
- How it behaves: slows drying time, prevents tip dry
- Best for: adding 5-10% to existing mix in dry conditions
💡 Acrylic retarder
- How it behaves: significantly slows drying, extends working time
- Best for: long detail sessions, hot or dry workspaces
💡 Windshield wiper fluid
- How it behaves: inexpensive substitute, contains some flow improver
- Best for: budget thinning for non-critical work only
💡 Isopropyl alcohol
- How it behaves: evaporates fast, hot solvent
- Best for: specialist applications only; risks brittle finish
For most painters, the right choice is brand-specific thinner for the paint brand you use most often. Tamiya X-20A for Tamiya acrylics. Vallejo Airbrush Thinner for Vallejo paints. The chemistry is matched to the binder, which means you can thin aggressively without weakening the paint.
Distilled water is acceptable when you are starting out and want to minimise costs. It works for hobby acrylics like Vallejo Model Color and Citadel Layer paints, but the more aggressively you thin with water, the more you risk breaking down the binder. Beyond roughly 1:1, water alone is rarely the best choice.
Avoid isopropyl alcohol as a general thinner. It evaporates so quickly that paint can start drying mid-air between the airbrush and the surface, producing a gritty finish and severe tip dry.
The Skim Milk Rule and How to Read Consistency
The skim milk analogy works because milk gives you a tactile and visual reference most painters already know.
How to check consistency properly:
After mixing thinner and paint in a separate cup, lift your stir stick straight out and observe how the paint runs off:
- Thick stream that clings and drips slowly — too thick, add more thinner
- Smooth, unbroken stream that coats the stick lightly — correct consistency
- Thin, fast-running stream like water — too thin, add more paint
The paint should leave a slightly translucent film on the side of the cup as it settles back down. If it leaves a thick, opaque coating, the mix is too thick. If it disappears entirely with no film, it is too thin.
Visual reference points:
- Single cream — too thick to airbrush cleanly through most nozzles
- Whole milk — workable with larger nozzles (0.5mm+), still slightly thick for fine work
- Skim milk — the target consistency for general airbrushing
- Watery coffee — over-thinned, will produce poor coverage and runs
Trust the visual cue more than any fixed ratio. Different paints behave differently even when the ratios are identical.

Common Thinning Ratios for Different Paint Types
These ratios are starting points. Always confirm with a consistency check before spraying.
1. Heavy-body acrylics (tube paints)
- Starting ratio: 2:1 to 3:1 thinner to paint
- Notes: designed for brush work, need significant thinning
2. Standard hobby acrylics (Vallejo Model Color, Citadel Layer)
- Starting ratio: 1:1 thinner to paint
- Notes: the reliable baseline for most figure painting work
3. Soft-body craft acrylics
- Starting ratio: 1:1 to 1:2 thinner to paint
- Notes: often lower pigment density, may need less thinning
4. "Airbrush ready" paints (Vallejo Air, Createx)
- Starting ratio: minimal thinning, sometimes just a few drops of flow improver
- Notes: often need only flow improver, not full thinning
5. Metallic paints
- Starting ratio: 1:1 with extra flow improver
- Notes: heavy flakes require special handling
6. Primers
- Starting ratio: 1:1 with brand-specific thinner
- Notes: surface adhesion matters more than smooth flow
7. Varnishes
- Starting ratio: 1:1 to 2:1 thinner to varnish
- Notes: thinner varnish coats produce better final results
For Vallejo Model Color specifically — a common choice for figure repaints — start at 1:1 with Vallejo Airbrush Thinner. Most colours work well at this ratio. Whites and yellows may need slightly more thinning due to higher pigment density.
For Tamiya acrylics, the standard is 1:1 with X-20A. Tamiya paint thinned with X-20A produces some of the smoothest airbrush results available, which is why it is the studio choice for many professional model painters.
How Nozzle Size Affects Your Ratio?
Most articles skip this entirely, but nozzle size is one of the most important variables in choosing your ratio.
0.2mm nozzle (fine detail)
- Best for: eyes, fine lines, small details, line work
- Thinning approach: thinner paint required, closer to 2:1 thinner to paint for standard acrylics
- PSI guidance: 10-15 PSI typically
0.3mm nozzle (general work)
- Best for: most figure painting, the workhorse size
- Thinning approach: standard 1:1 ratio for most paints
- PSI guidance: 15-20 PSI typically
0.5mm nozzle (broad coverage)
- Best for: large base coats, primer, varnish application
- Thinning approach: slightly thicker mixes acceptable, 1:1 or even slightly less thinner
- PSI guidance: 20-25 PSI typically
A 0.2mm needle is unforgiving. Paint that works perfectly through a 0.5mm needle may clog a 0.2mm needle within seconds. If you are switching to fine detail work, increase your thinner ratio rather than fighting clogs.
A 0.5mm needle handles thicker paint but produces a wider spray pattern. For figure work, most painters settle on a 0.3mm as the default and switch up or down only for specific tasks.
If you find yourself constantly thinning paint to extreme ratios just to spray it cleanly, the issue may be your nozzle size rather than your thinning approach.

PSI Tuning and How It Interacts With Thinning
Air pressure and paint consistency work together. Adjusting one without considering the other often makes problems worse.
General PSI guidelines for figure painting:
- Primer coats: 25-30 PSI
- Base coats over large areas: 20-25 PSI
- General detail work: 15-20 PSI
- Fine line work: 10-15 PSI
- Varnish coats: 20-25 PSI
The PSI and thinning relationship:
- Higher PSI requires slightly thicker paint — the air pressure helps atomise denser paint
- Lower PSI requires thinner paint — less air pressure means the paint must flow more easily on its own
- Spider-webbing is usually a PSI problem first, thinning second — lowering PSI often solves the issue without changing the mix
If your paint is mixed correctly but you are still getting orange peel, the fix is often to lower PSI rather than thin further. If you are getting weak, transparent coverage at low PSI, raising the pressure slightly can help without forcing you to thicken the paint.
For most figure painting work, 15-20 PSI with 1:1 thinned paint is the productive starting zone.
The Mixing Workflow Professional Painters Use
How you mix matters as much as what you mix.
🎨 Step 1: Always mix outside the cup
Pouring paint and thinner directly into the airbrush cup produces an inconsistent mix that cannot be stirred properly. The narrow cup geometry makes thorough mixing nearly impossible.
Use a separate small mixing cup, a dedicated mixing palette, or a clean plastic shot glass. Mix thoroughly before transferring to the airbrush.
🎨 Step 2: Add thinner first, then paint
Adding paint to thinner produces a more uniform mix than adding thinner to paint. The reverse order tends to leave clumps that resist breaking down.
🎨 Step 3: Stir, do not shake
Shaking introduces air bubbles that affect spray quality. Stirring with a clean stick or pipette produces a smoother mix without bubbles.
🎨 Step 4: Stir for longer than feels necessary
Most beginner mixes are under-stirred. Stir for at least 30 seconds for standard colours and significantly longer for metallics or pearl effects. Pigment that has not been fully integrated will clog the nozzle even if the visible consistency looks correct.
🎨 Step 5: Check consistency before transferring
Lift the stir stick out and observe the flow. If the mix is not at skim milk consistency, adjust before transferring to the airbrush.
🎨 Step 6: Strain if necessary
For old paint or for mixes that have any visible specks of dried pigment, strain through a small paint strainer before transferring. This single step eliminates the majority of clogs.
This workflow takes two or three minutes longer than dumping paint directly into the airbrush. It saves hours of clearing clogs and reloading.
How to Test Your Mix Before You Spray?
A test spray is not optional. Every session, every new colour, every reload.
Set up a dedicated test surface:
- White plastic spoons — cheap, curved surface mimics figure contours
- Sheet styrene or plasticard — flat surface for checking spray pattern uniformity
- Spare sprue or old figure parts — closest to the actual painting surface
- Cardboard for quick checks — fine for ratio confirmation, less useful for adhesion testing
What to test:
- Smooth pass — replicate the broad sweeping motion you will use for base coats
- Fine line — practise the close, controlled passes used for detail work
- Stopping and starting — check whether the airbrush sputters or hesitates on trigger pulls
- Layering — apply a second coat over the first and watch for adhesion problems
Reading the test:
- Smooth, even mist with clean coverage — the mix is ready
- Sputtering or spitting — paint is too thick, add more thinner
- Spider-webbing on contact — paint is too thin or PSI is too high
- Runs or pooling — too thin, or you are applying too much in one pass
- Gritty texture immediately on landing — paint is drying too fast, add flow improver
Spend two minutes testing rather than thirty minutes stripping a failed coat from a figure. The discipline pays for itself every session.
Environmental Factors That Change Your Ratio
Most articles ignore this. Temperature, humidity, and even altitude affect how paint behaves through an airbrush.
Temperature:
- Cold workspaces (below 18°C) — paint thickens, requires more thinner
- Warm workspaces (above 25°C) — paint thins naturally and dries faster, may need flow improver
- Hot workspaces — tip dry becomes severe, work in shorter sessions
Humidity:
- Low humidity (below 40%) — paint dries before reaching the surface, increasing tip dry. Add flow improver
- High humidity (above 70%) — varnish and primer can produce hazy or frosted finishes. Avoid sealing on humid days
- Ideal humidity for airbrushing — 45-60%
Altitude:
- High altitude reduces effective air pressure even at the same compressor PSI setting
- Painters at significant altitude often need to compensate with slightly higher pressure or thicker paint
If your mix that worked perfectly last week is now causing problems, check whether your environment has changed before assuming the paint has degraded.
Troubleshooting Common Airbrushing Issues
Even with a perfect mix, problems happen. Recognising them quickly saves time.
1. Tip dry
Paint drying on the needle tip, causing inconsistent spray.
- Add a few drops of flow improver to the mix
- Keep a cotton swab with airbrush cleaner nearby and wipe the needle every few minutes
- Empty and clean the cup if pausing for more than a minute
2. Orange peel
Bumpy, pebbly texture on the painted surface.
- Most likely cause: paint is still too thick
- Secondary cause: spraying from too far away (aim for 4-6 inches)
- Less common: low ambient temperature causing partial drying in flight
3. Spider-webbing
Paint spreading in thin web-like lines on contact.
- Reduce PSI first before changing the mix
- If reducing PSI does not help, thicken the paint slightly by adding a small amount of unthinned paint
3. Spitting and sputtering
Paint ejecting in dots rather than a fine mist.
- Almost always paint that is too thick or beginning to clog the nozzle
- Thin further, or stop and clean the airbrush
4. Weak coverage
Paint barely visible after application.
- Over-thinned paint with insufficient pigment density
- Add a few drops of unthinned paint back into the cup
5. Inconsistent spray pattern
Spray drifts side to side or feels uneven.
- Check that the nozzle cap is properly tightened
- Check that the needle is clean and undamaged
- Confirm PSI is stable on the compressor gauge
Pro Recipes and Studio Mixes
For painters ready to move beyond basic thinning, certain mixes work particularly well for specific applications.
The smooth base coat mix:
- 1 part paint
- 1 part brand-specific thinner
- 2-3 drops of flow improver per cup
Produces a buttery, consistent base coat with excellent self-levelling. Ideal for large areas like bodysuits, capes, and primer layers.
The fine detail mix:
- 1 part paint
- 1.5 to 2 parts thinner
- 1-2 drops of flow improver
Used through a 0.2mm needle at 12-15 PSI for line work, eye detail, and small accents. Thinner than standard for smoother flow at low pressure.
The metallic mix:
- 1 part metallic paint
- 1 part thinner
- 3-5 drops of flow improver
- Optional: 1-2 drops of acrylic retarder
Keeps heavy metal flakes suspended longer and reduces clogging through standard nozzles. Stir aggressively before each spray.
The varnish mix:
- 1 part varnish (matte or gloss)
- 1.5 parts thinner
Thin varnish coats produce significantly better final results than thicker ones. Two thin coats outperform one heavy coat every time.
The Vallejo Game Air pre-thinned correction:
Vallejo Game Air is sold as "airbrush ready" but often performs better with a small amount of additional flow improver — 2-3 drops per cup, no additional thinner. This addresses the tip dry issues common with the line at lower PSI.
These mixes are starting points rather than rigid recipes. Adjust based on your specific paint brand, nozzle, and environment.
Frequently Asked Questions
Can I use alcohol to thin acrylic paint for airbrushing?
It is possible but rarely advisable. Isopropyl alcohol evaporates so quickly that paint often begins drying between the airbrush and the surface, causing severe tip dry, gritty finishes, and reduced paint durability. Use dedicated airbrush thinner or distilled water for predictable results.
What is the difference between thinner and flow improver?
Thinner changes the paint's viscosity to make it spray cleanly. Flow improver changes the paint's drying time to keep it from drying on the airbrush needle. Most sessions need only thinner; add flow improver when working in dry conditions or with persistent tip dry.
Why are metallics so difficult to airbrush?
Metallic paints contain heavy flake pigments that settle quickly and can clog smaller nozzles. Stir vigorously before spraying, consider switching to a larger nozzle (0.3mm or 0.5mm), and add extra flow improver to keep the flakes suspended throughout the session.
Can I airbrush figure paints without thinning at all?
Some specifically "airbrush ready" paints (Vallejo Air, Createx Wicked Colors) can technically spray without thinning, but most painters still add a few drops of flow improver for optimal performance. Standard hobby acrylics always need thinning regardless of the bottle claim.
How do I know if I have over-thinned paint?
Weak coverage that requires four or more coats for opacity, runs and pooling on contact, spider-webbing, or paint that visibly separates in the cup are all signs of over-thinning. Add a small amount of unthinned paint to recover the mix.
Why does my mix that worked yesterday not work today?
Almost always an environmental change. Check the temperature, humidity, and whether your paint has thickened in the bottle since last use. Adjust thinning ratio accordingly rather than assuming the paint or airbrush is faulty.
Is there a structured course that covers airbrushing for figure repainting?
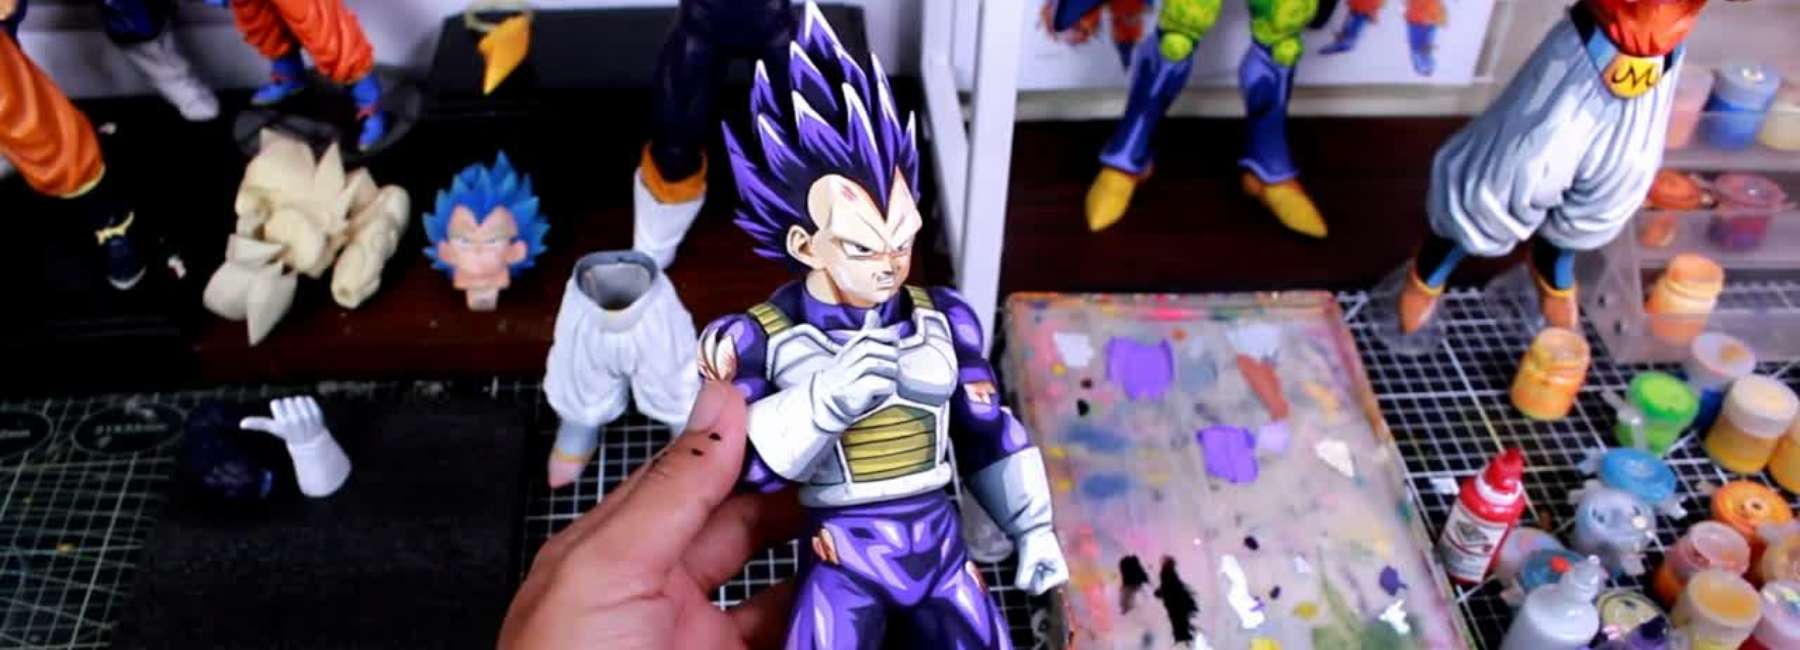
Our anime figure painting course below, walks through the complete repaint workflow on a real Vegeta figure, including the airbrush applications that benefit from proper thinning. It is built around the techniques used in our studio for collector-grade Dragon Ball figure work.
How long does properly thinned acrylic paint stay usable in the airbrush cup?
For most acrylics, 20-30 minutes before tip dry becomes a serious issue. Adding flow improver extends this to 45-60 minutes. For longer sessions, empty and refill the cup periodically rather than fighting drying paint.
👉 Learn to Repaint: Figure Painting Course
Conclusion: Mastering Acrylic Paint Thinning
Thinning is not a side task in airbrushing. It is the variable that separates clean professional results from frustrating paint job sessions. The skim milk consistency is the foundation. The 1:1 starting ratio gets you into the productive zone.
The mixing workflow keeps your sessions running smoothly. The PSI tuning, nozzle awareness, and environmental adjustments push your results into pro territory. What separates painters who produce studio-quality work from painters who fight their airbrush every session is not better equipment. It is better preparation.
Mixing outside the cup, testing before spraying, adjusting for conditions, and respecting that every paint behaves slightly differently — these small disciplines compound into significantly better results across every figure.

Share:
Top 10 Collectible Dragon Ball Figure Repaints | Custom 2D
Simple Beginner Guide to Painting a Custom Anime Figure